How to Take Unique Travel Photos (Without a Drone)
I have been fortunate enough in the last few months to travel to some incredible, but very popular destinations around Southeast Asia. They are very popular for good reason. Thousands upon thousands of people descend on locations like Bangkok, Hoi An and El Nido capturing the instagram-worthy vibes. But how do you take photographs that are different? How does your photography stand out from the crowd? Can you compete with the influencers?
In this blog post, I’ll be trying to dissect just how I managed that by looking at a few of my images from the islands of Palawan in the Philippines - an Instagram heaven from top to bottom. Read on for three focus points (and a bonus) for you to think about next time you travel to a popular destination.
Before you go…
Do your research - but not too much.
If you’re anything like me, you’ll likely do a quick Google and Instagram search of the locations that you’re heading to. This is important, and will give you an idea of the kind of pictures that many people before you have taken. It’s a double edged sword, though. It tells you what has been done already (and in this example, done to death), but can also drag you into copying those very same photographs.
Take Palawan - here is a screenshot from a Google search of “travel photography Palawan”:
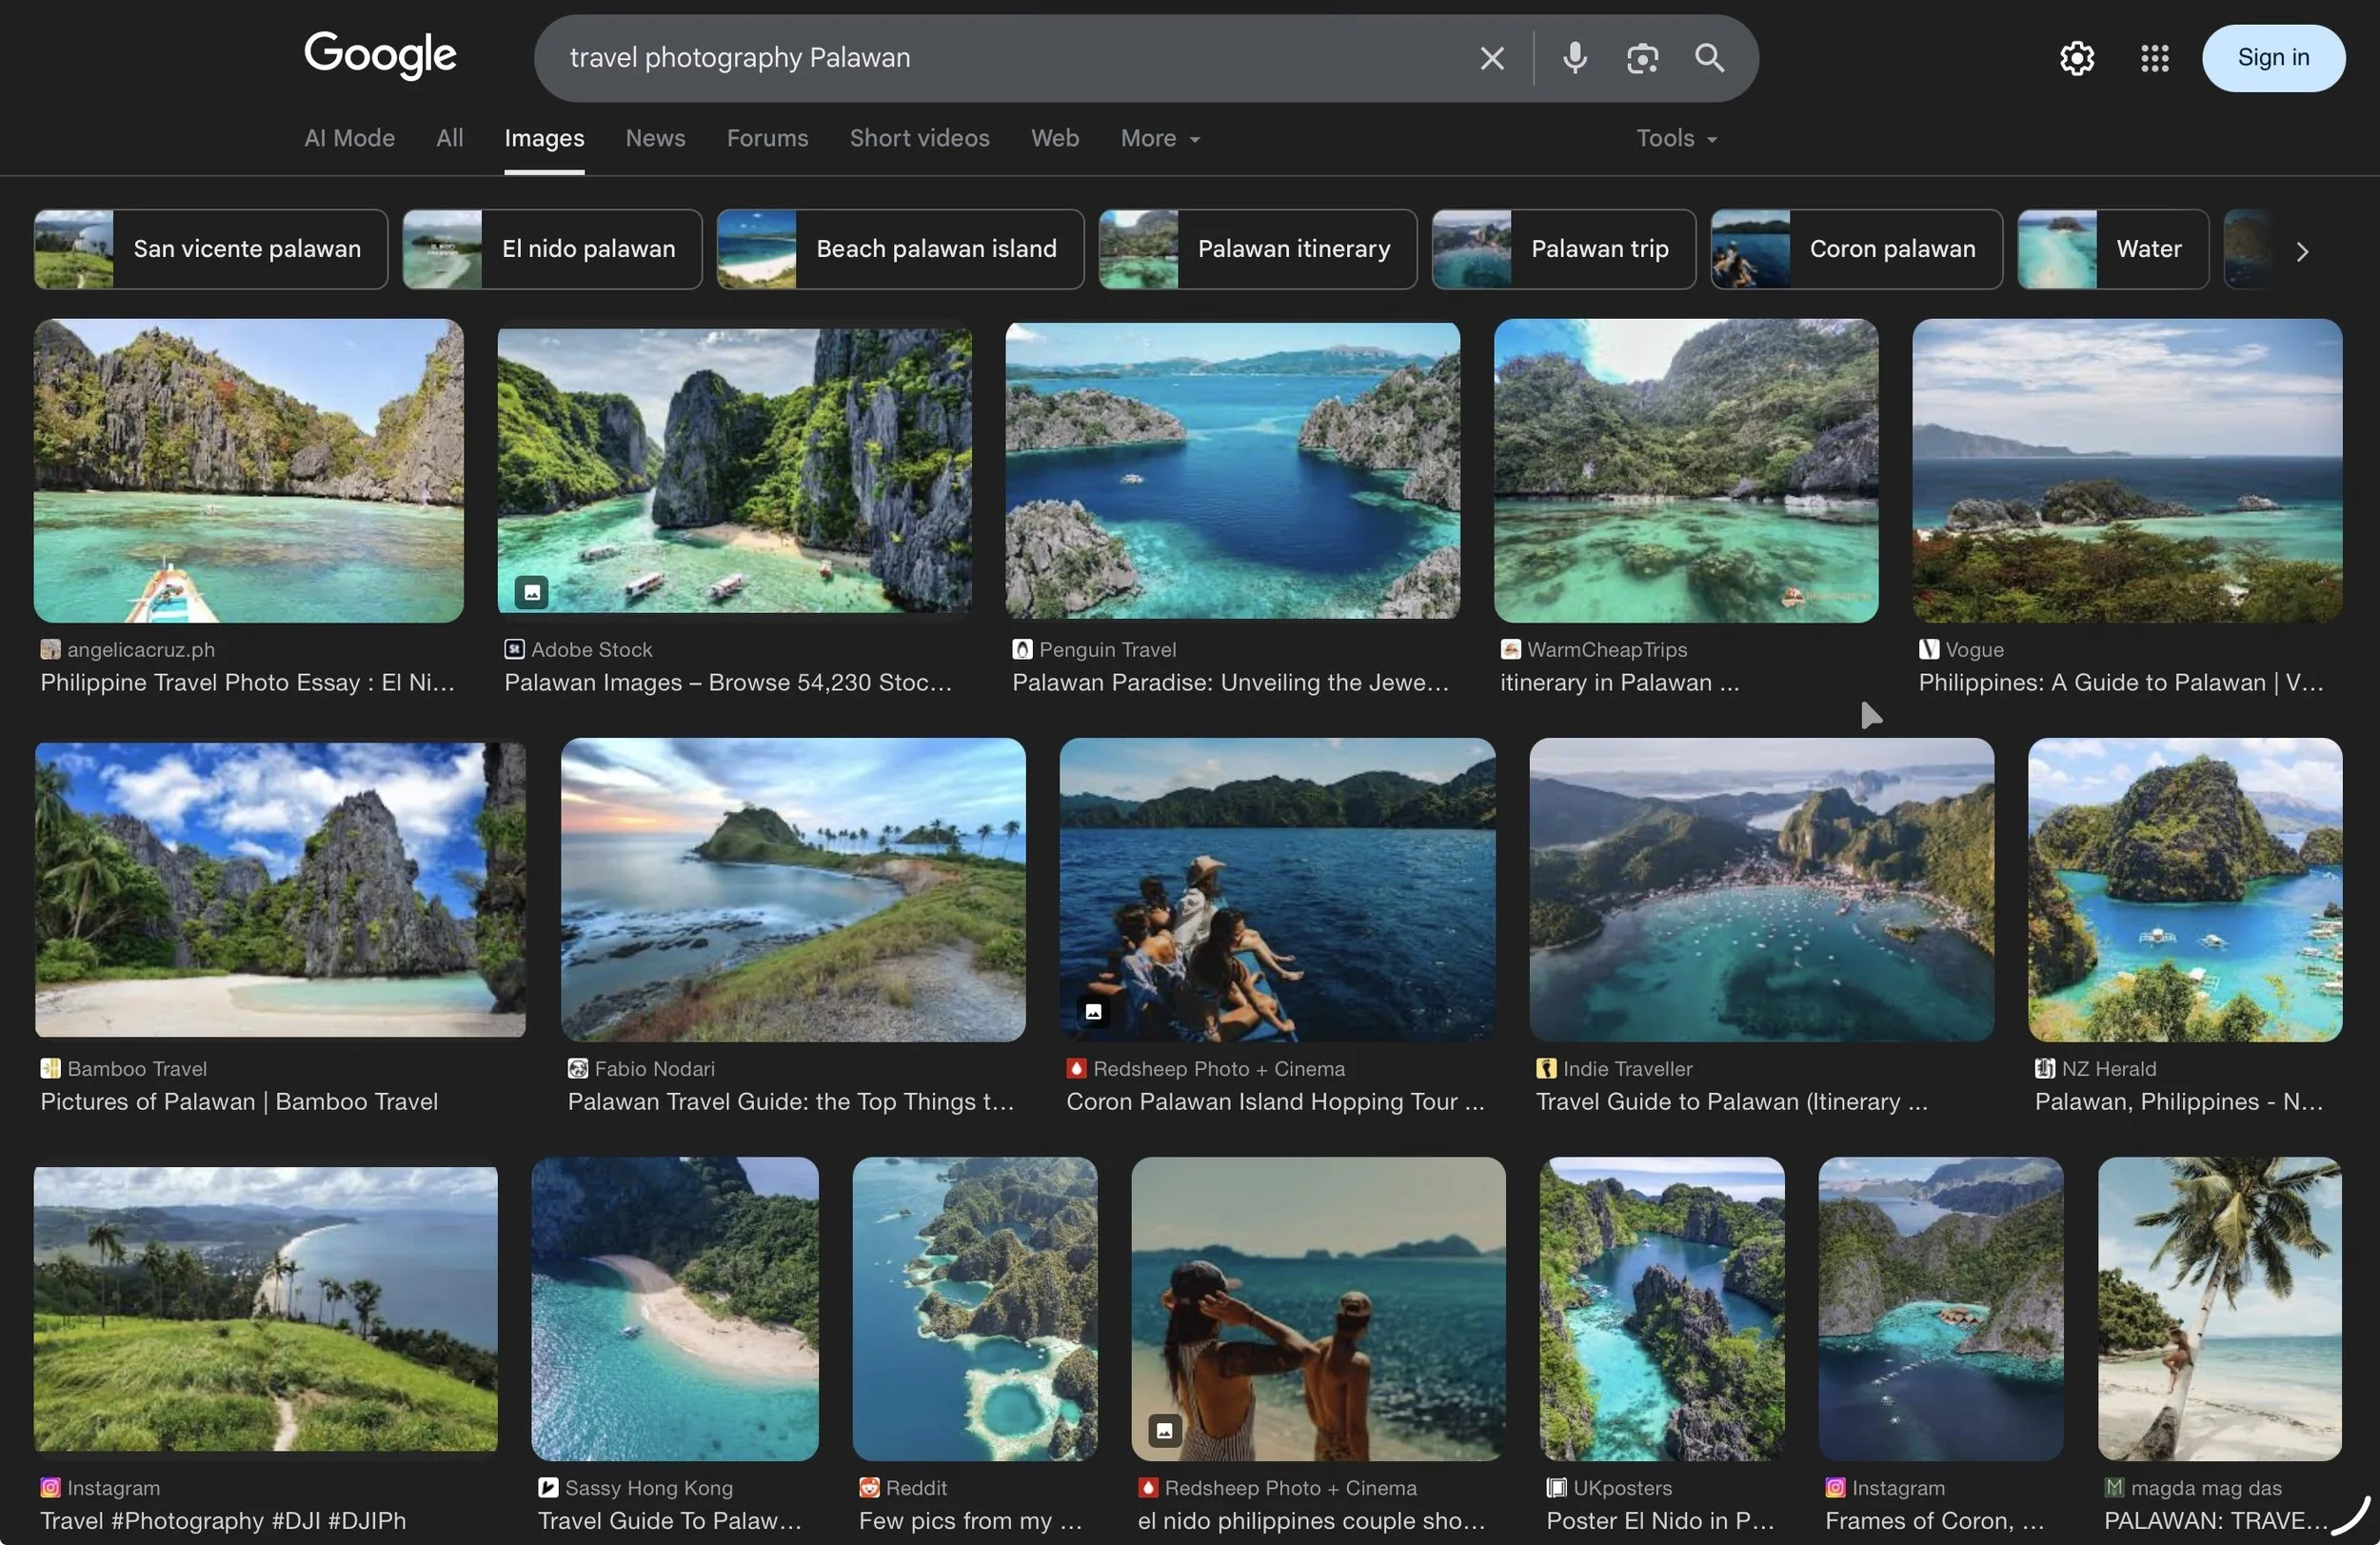
What do you notice?
To me, everything is vibrant green and blue. Drones are the most common gear choice. There isn’t much variety.
I know the top results on Google aren’t exactly the be-all and end-all, so let’s try a “Palawan photography” search on Instagram:
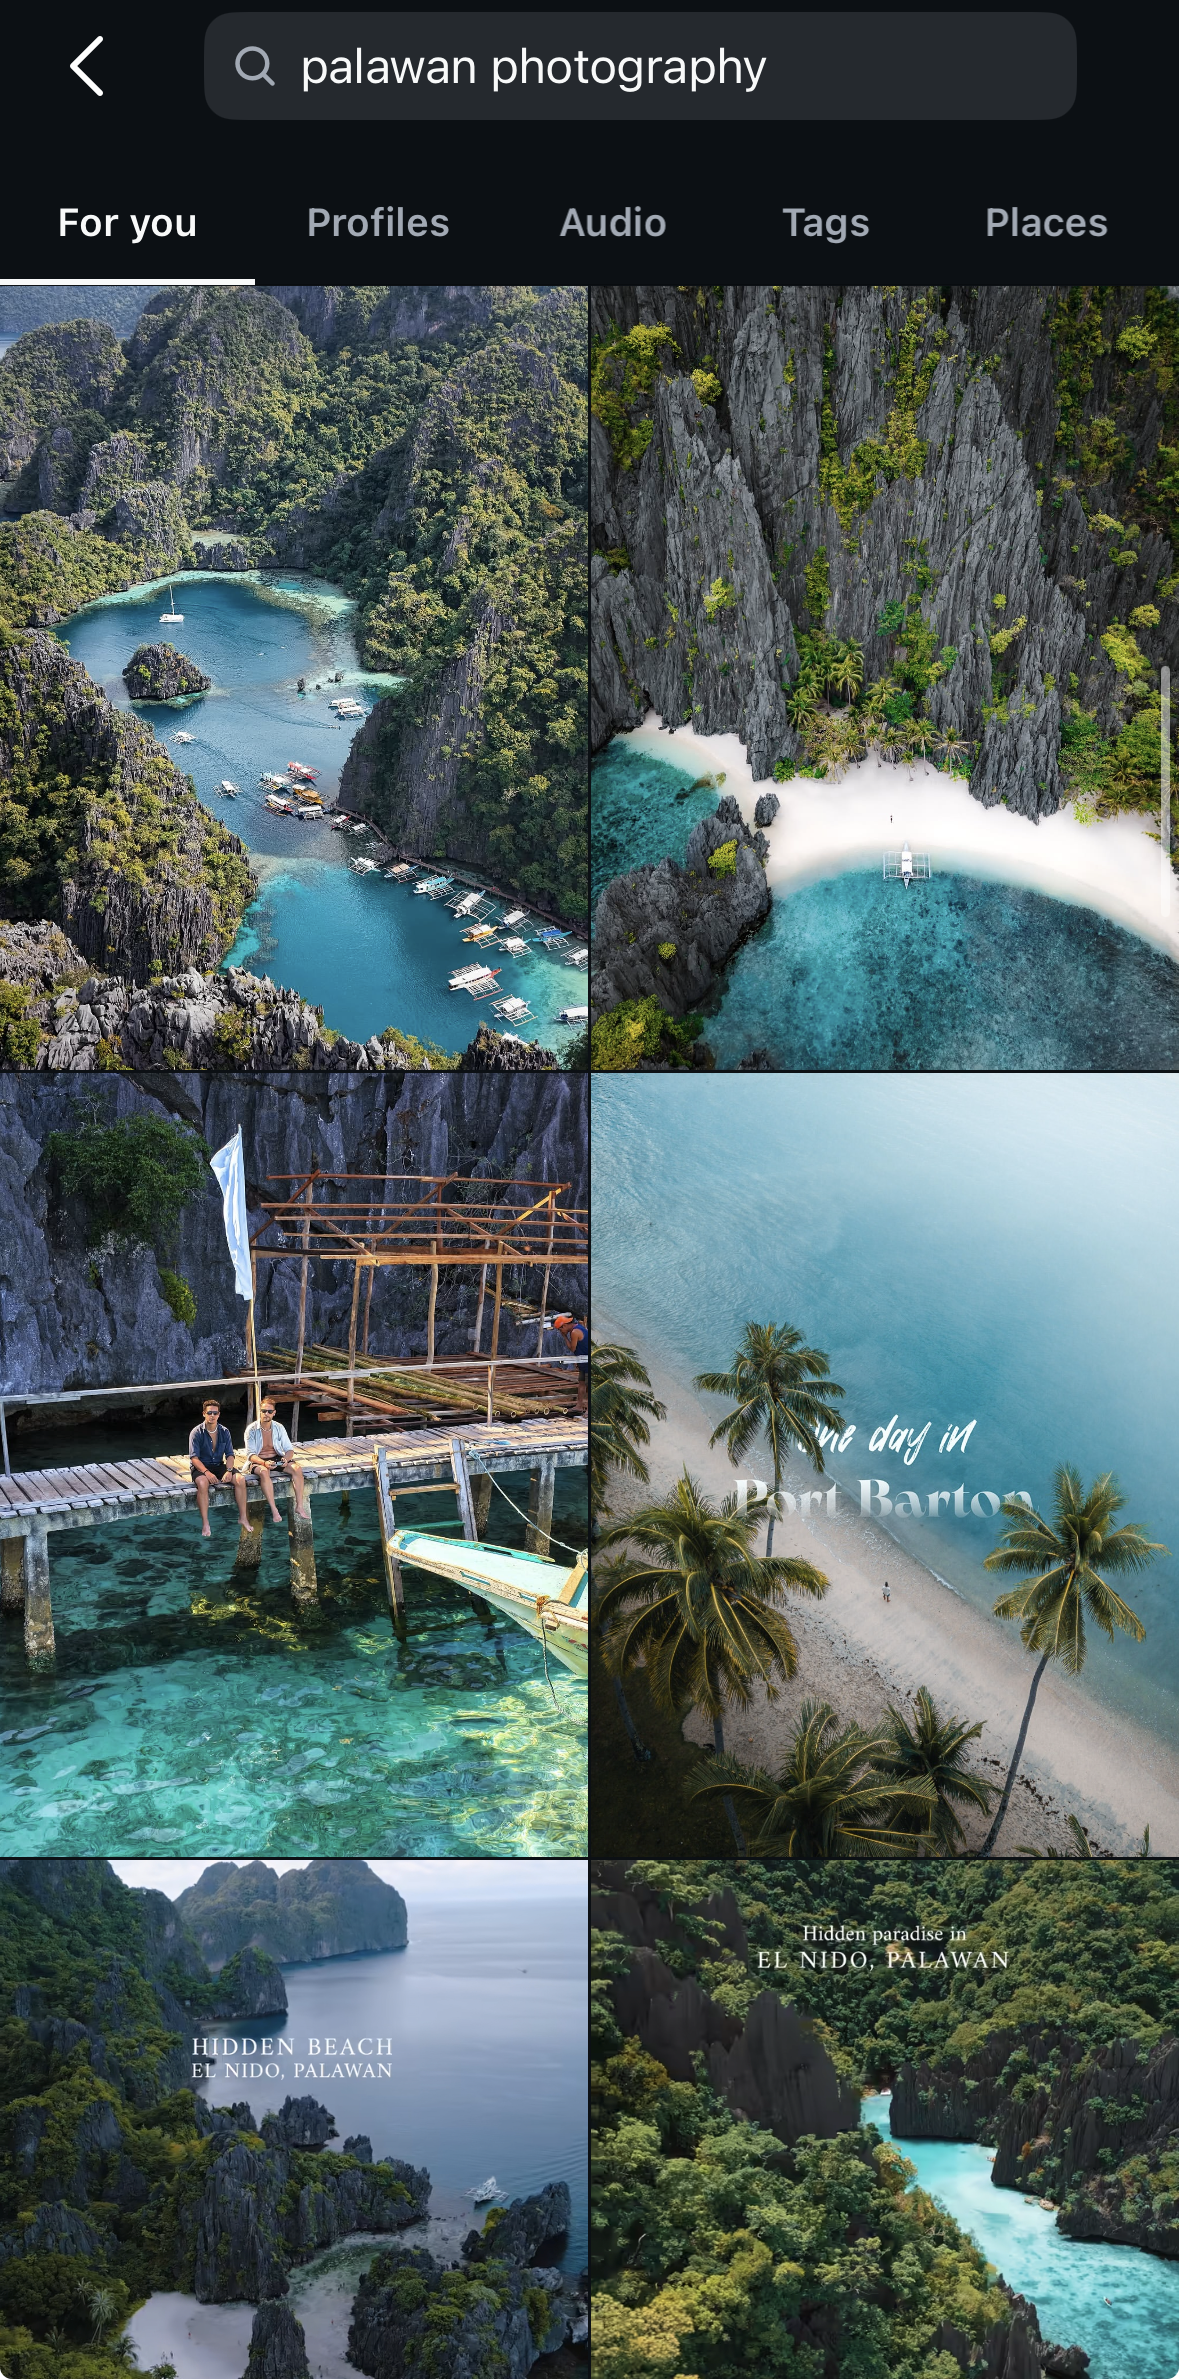
Surprise surprise - drone images, lots of green, lots of blue.
Granted, Instagram is not the oracle of all travel photography as it’s dominated by influencers, but you can see what I’m getting at. Yes, Palawan is very green and very blue, but it’s clear that everyone before you has already documented that and shown it to the world. Everyone already has the drone shot. Everyone has shown its clear water and tropical greens. If that’s what you’d like to go and repeat, then please do. But I don’t think you’d be here and reading this if you do.
Now you know all of this, you know what to avoid in order to make your photography stand out. So what pictures do you take instead? Here’s what I look for:
1. Focus on the people.
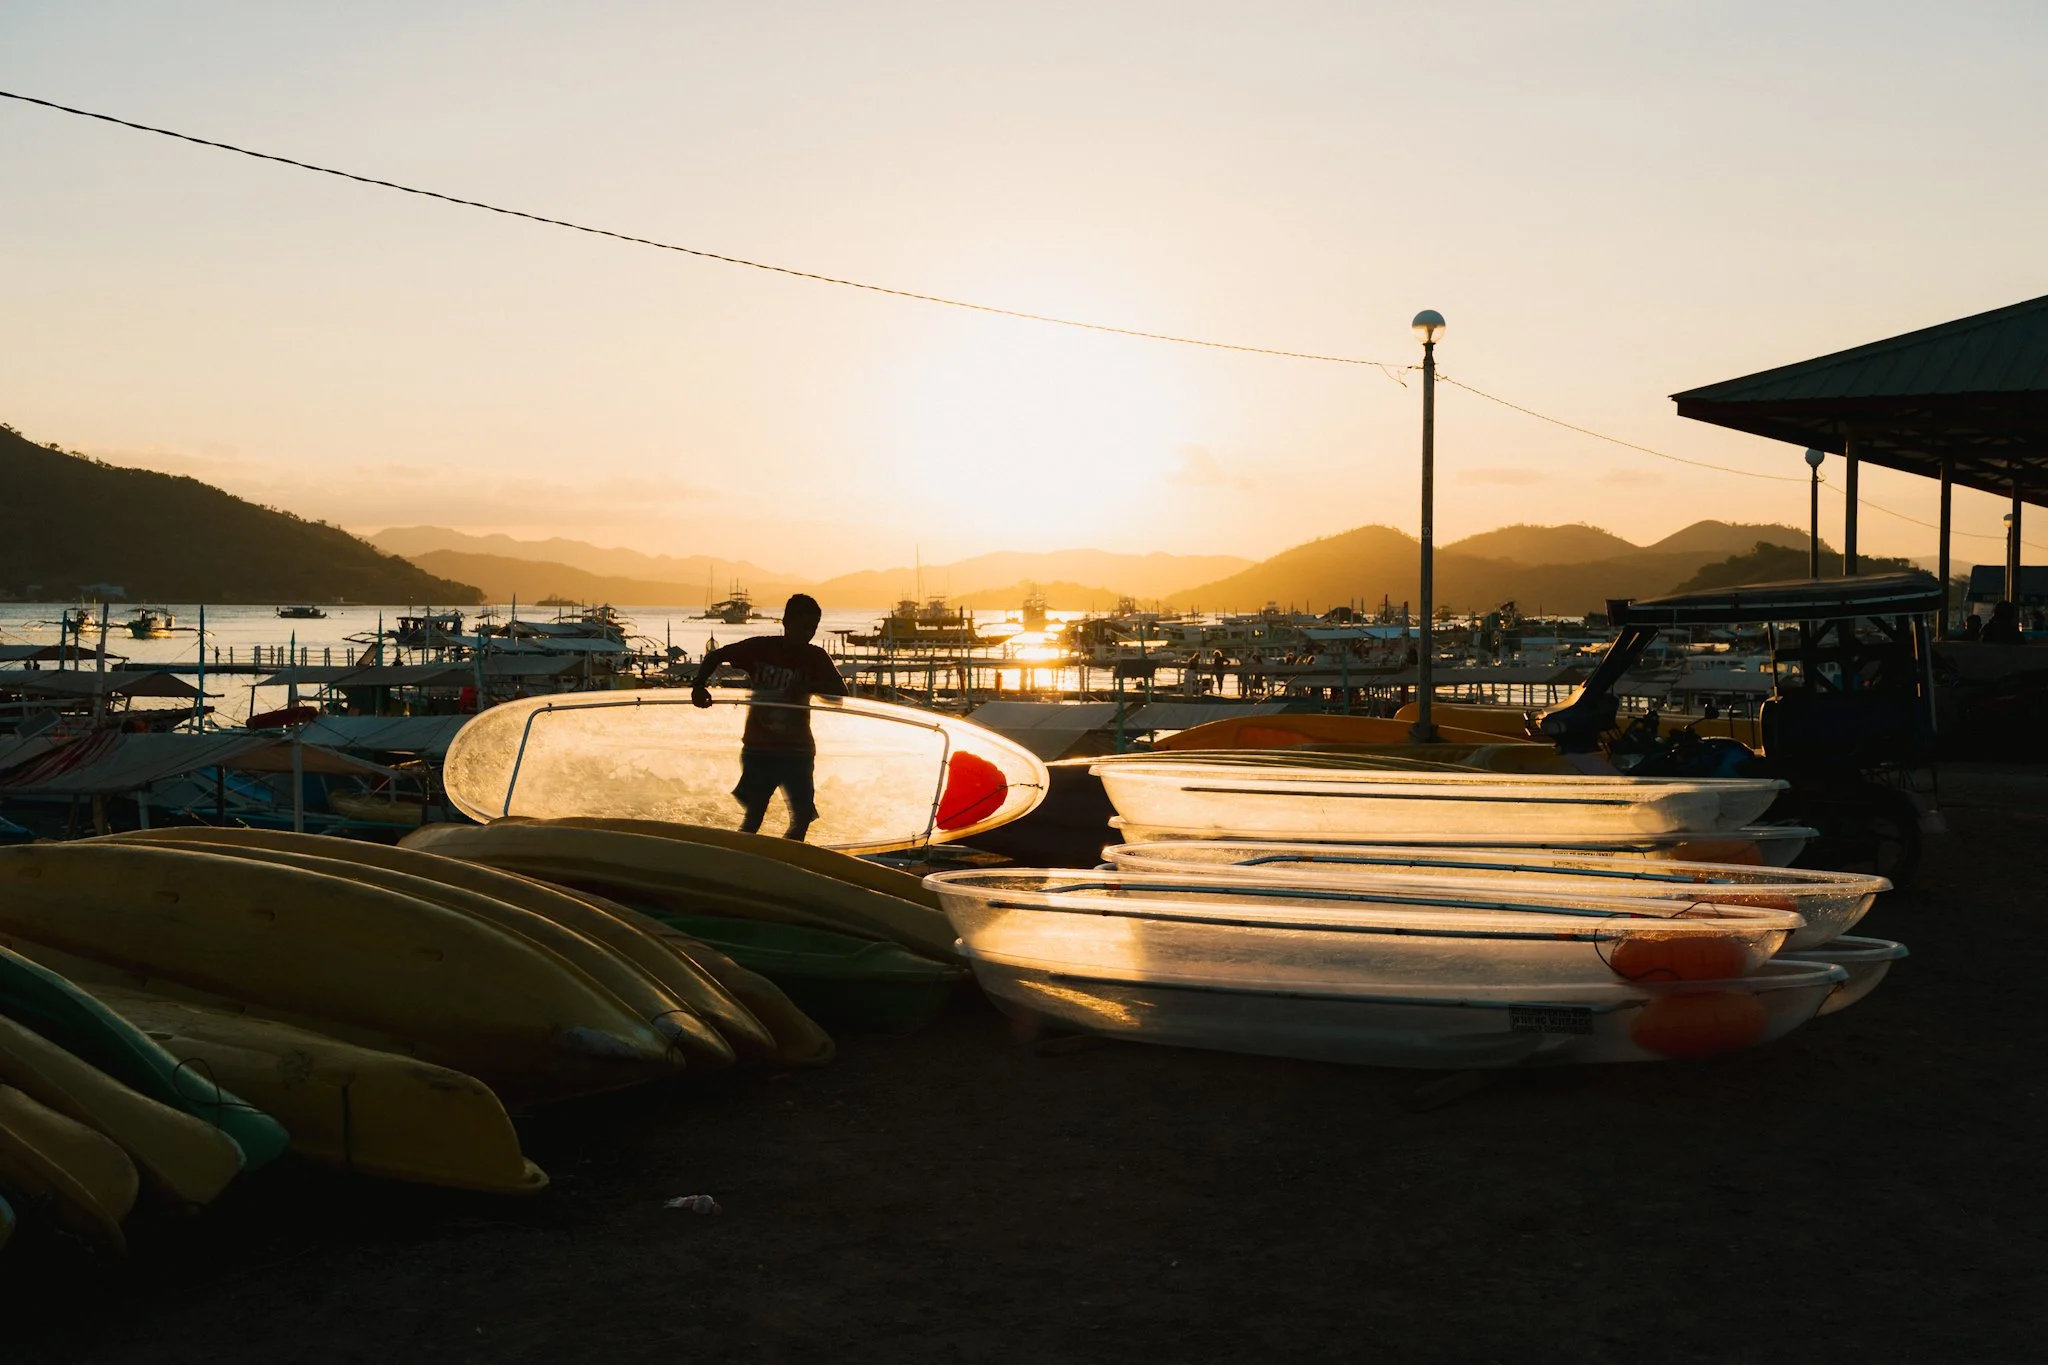
Travel photography often focuses too much on the destination and not the people that make it tick. That amazing day trip you did? There’s a host of people behind all of it that help it run smoothly. Take the image above as my example.
Coron, in northern Palawan, is famous for its day trips to various paradise Instagram spots, much like those seen in the searches above. You have the option to rent clear bottom kayaks to get the best views of the clear water whilst paddling around lagoons and coral reefs. Someone has the job to pick these kayaks up and get them to and from the port for the numerous day trips.
I stuck around after our day trip as the sun was lowering, and captured this local person doing just that. It happens every day, but I’ve never seen an image like it. Shooting into the light, the silhouette can be seen through and above the soft and warm diffused light passing through the clear kayaks, with the port, boats and mountains in the background.
The key take away is this: great travel photography doesn’t just equate to capturing beautiful destinations. The stories, rhythms, and people behind these destinations play a huge part.
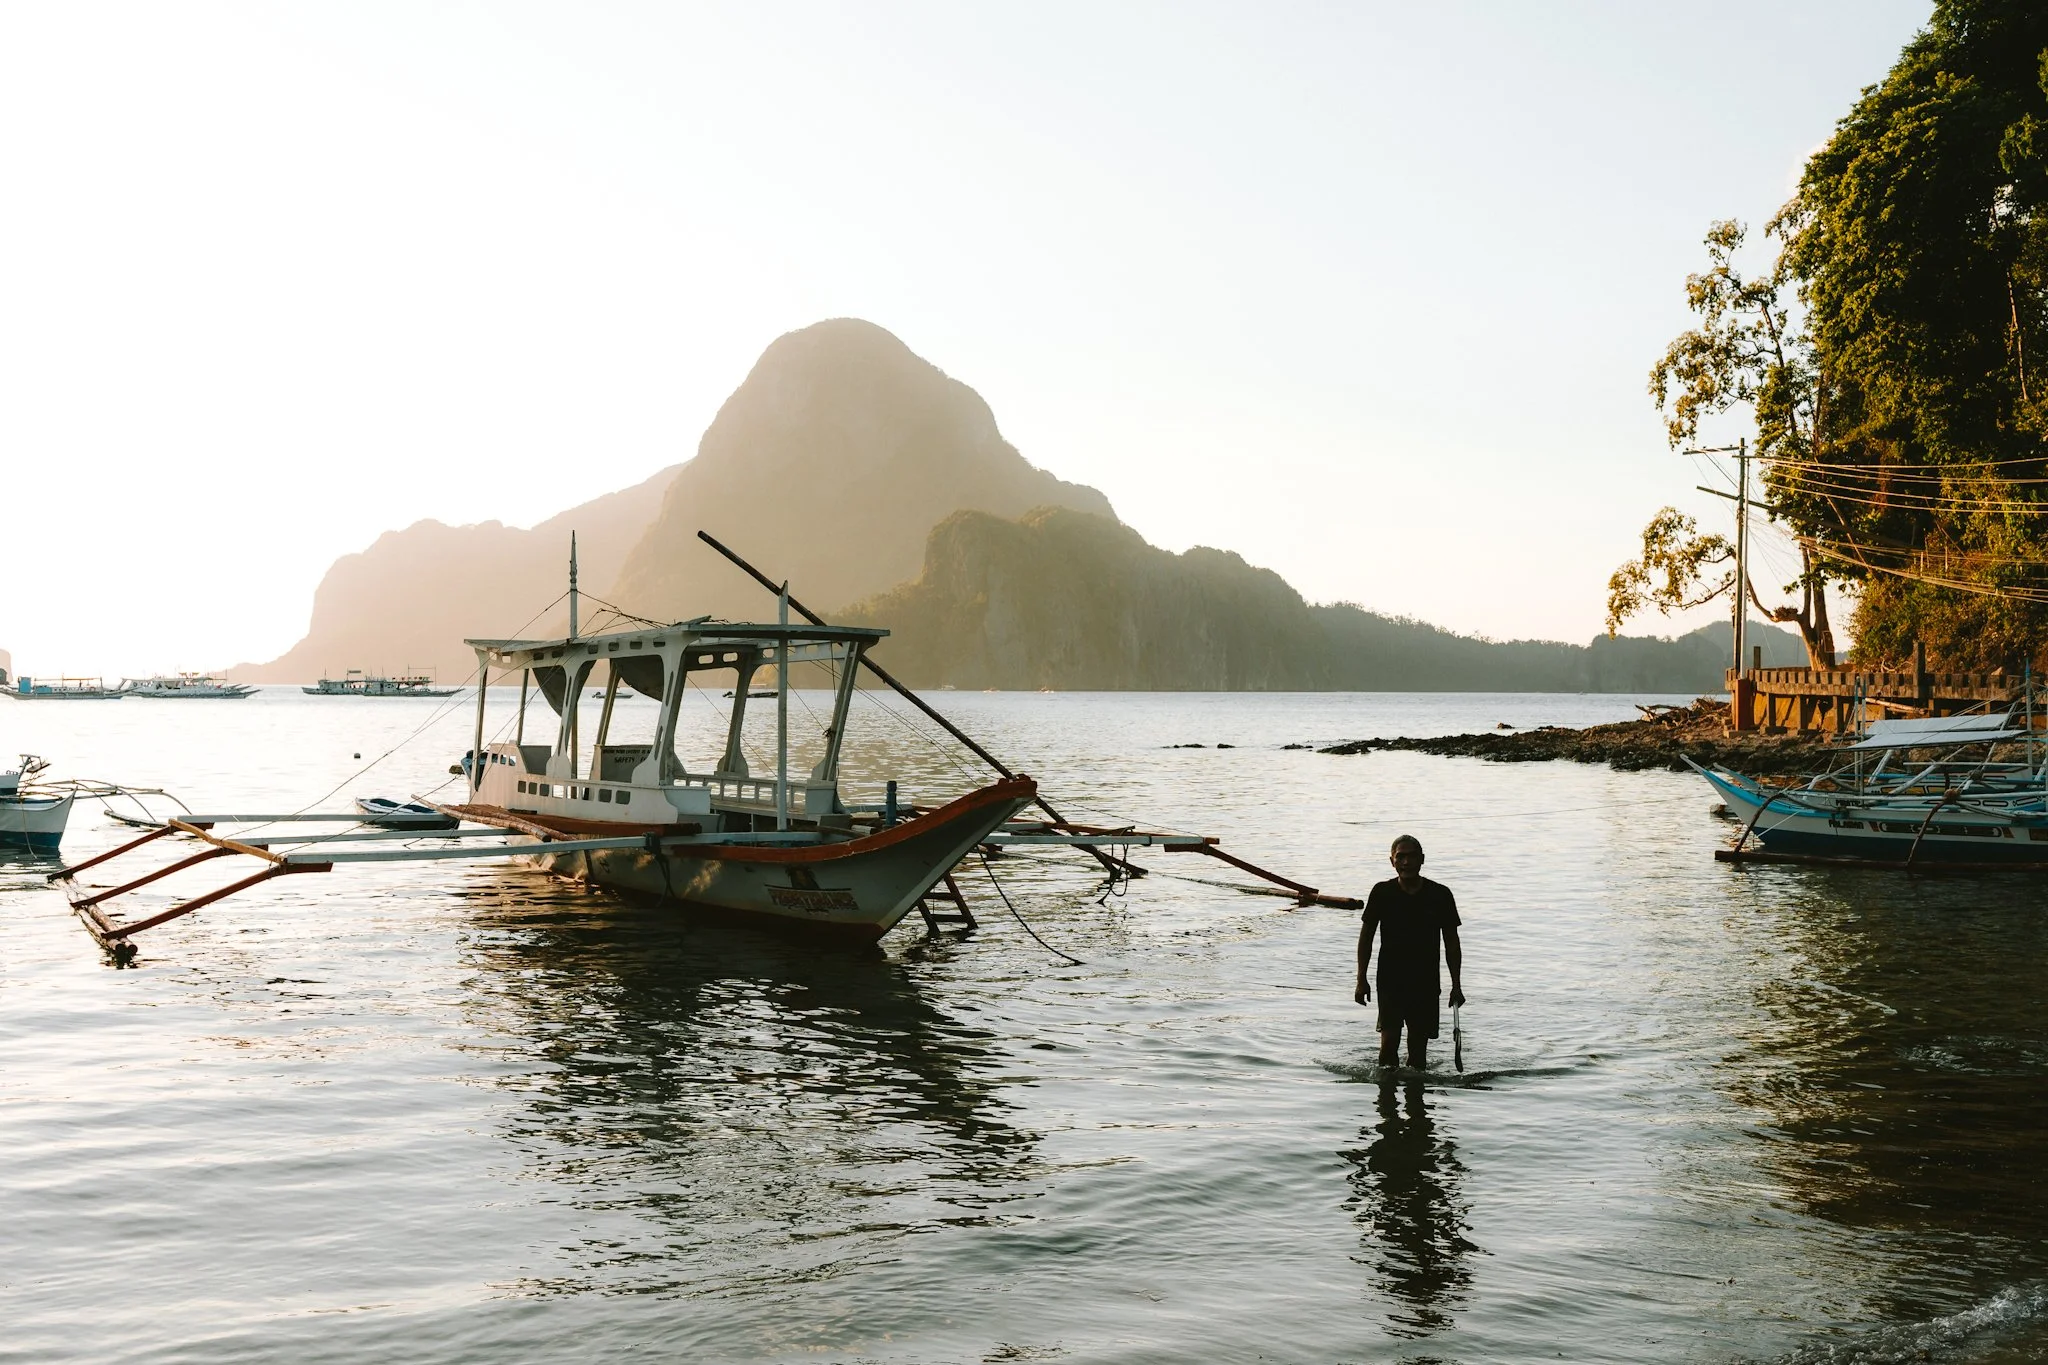
2. Focus on light.
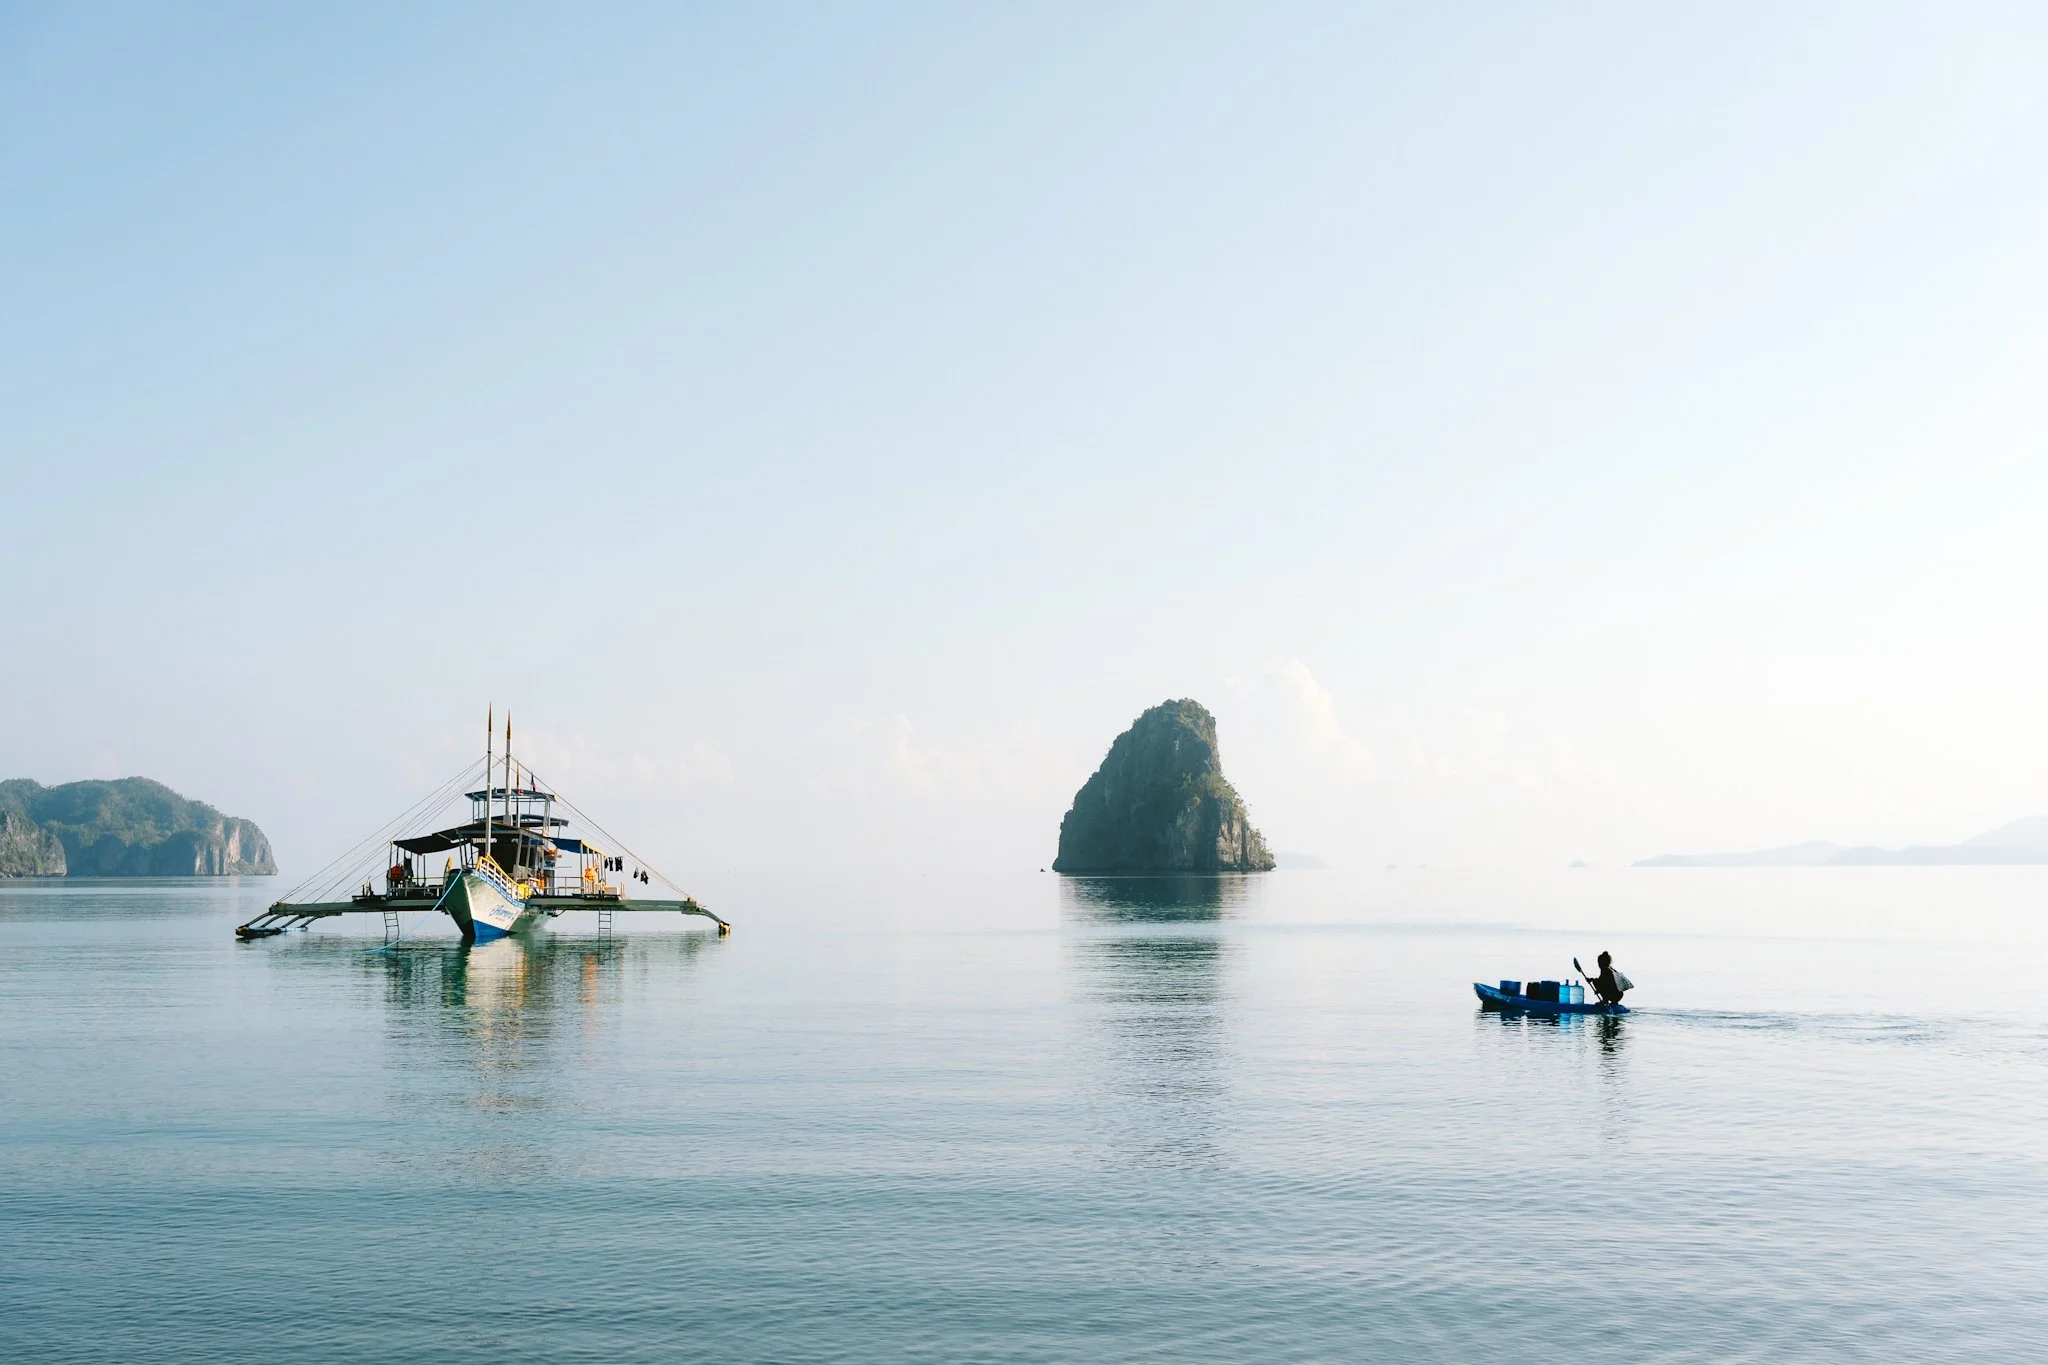
This next image is only made possible by the light. Compositionally, it works because there’s three subjects (rule of odds), each spaced nicely across the frame with plenty of room to breathe. It also tells a story and focuses on a person going about the day, much as I mentioned in the previous point. But the critical thing here is the light.
This photo was taken at roughly 7:30am, around 90 minutes after sunrise. Had this been taken at sunrise, midday, or sunset, the side lighting that is seen off the right hand side of the frame would not have been present and the image would be flat, or all about the colours of the sunrise or sunset, and not the story it tells.
This soft morning side-light renders just enough detail in the right hand side of the subjects (the right hand side of the boat, the right hand side of the island, and the right hand side of the contents on the kayak) while giving enough depth and natural contrast to the image with the opposing shadows.
Referring back to the Google and Instagram searches above, there are very few that exhibit this low soft light. Why? Because lots of people only get their images on day trips and this kind of light has already gone, or they don’t hang around long enough for it in the early evening.
How do you make a decent image when the sun is high in the sky and everything seems harsh and flat? Use a different angle - drones. That’s why drone images always look great, no matter the time of day. The way light and shadows appear differently because our eyes are not used to seeing the world from above.
Key take away: use the hours just after sunrise or just before sunset to get soft dynamic lighting. This completely changes the way scenes look and avoids the other travel photography clichés that rely on golden hours without substance or drones during the day.
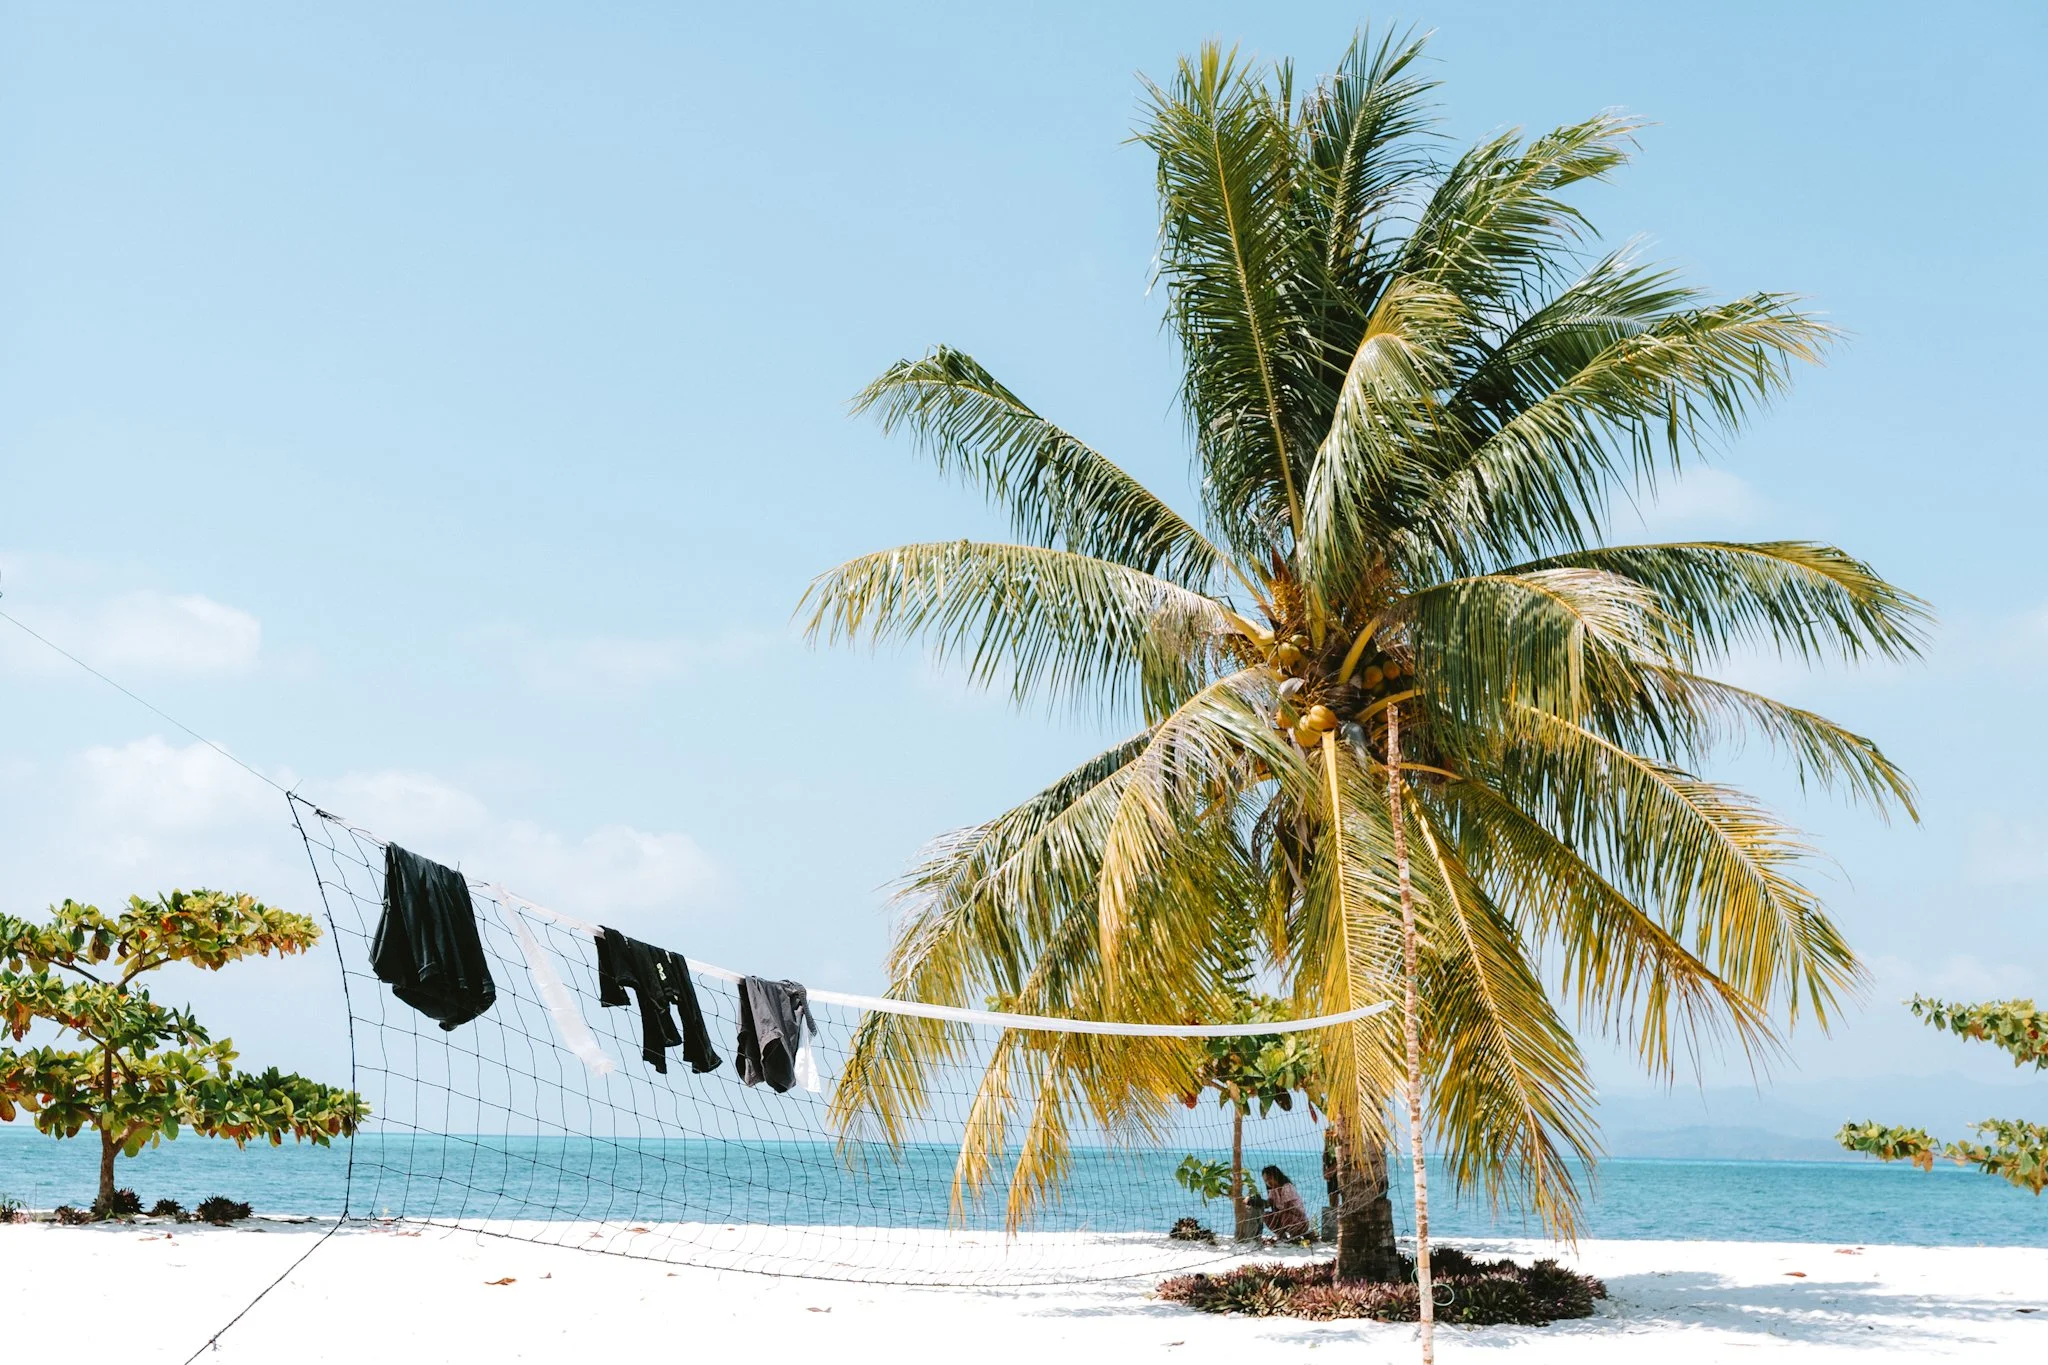
3. Focus on clean composition.
As with the previous image, clean composition is a fantastic way to elevate your travel photography and make it stand out amongst the crowds.
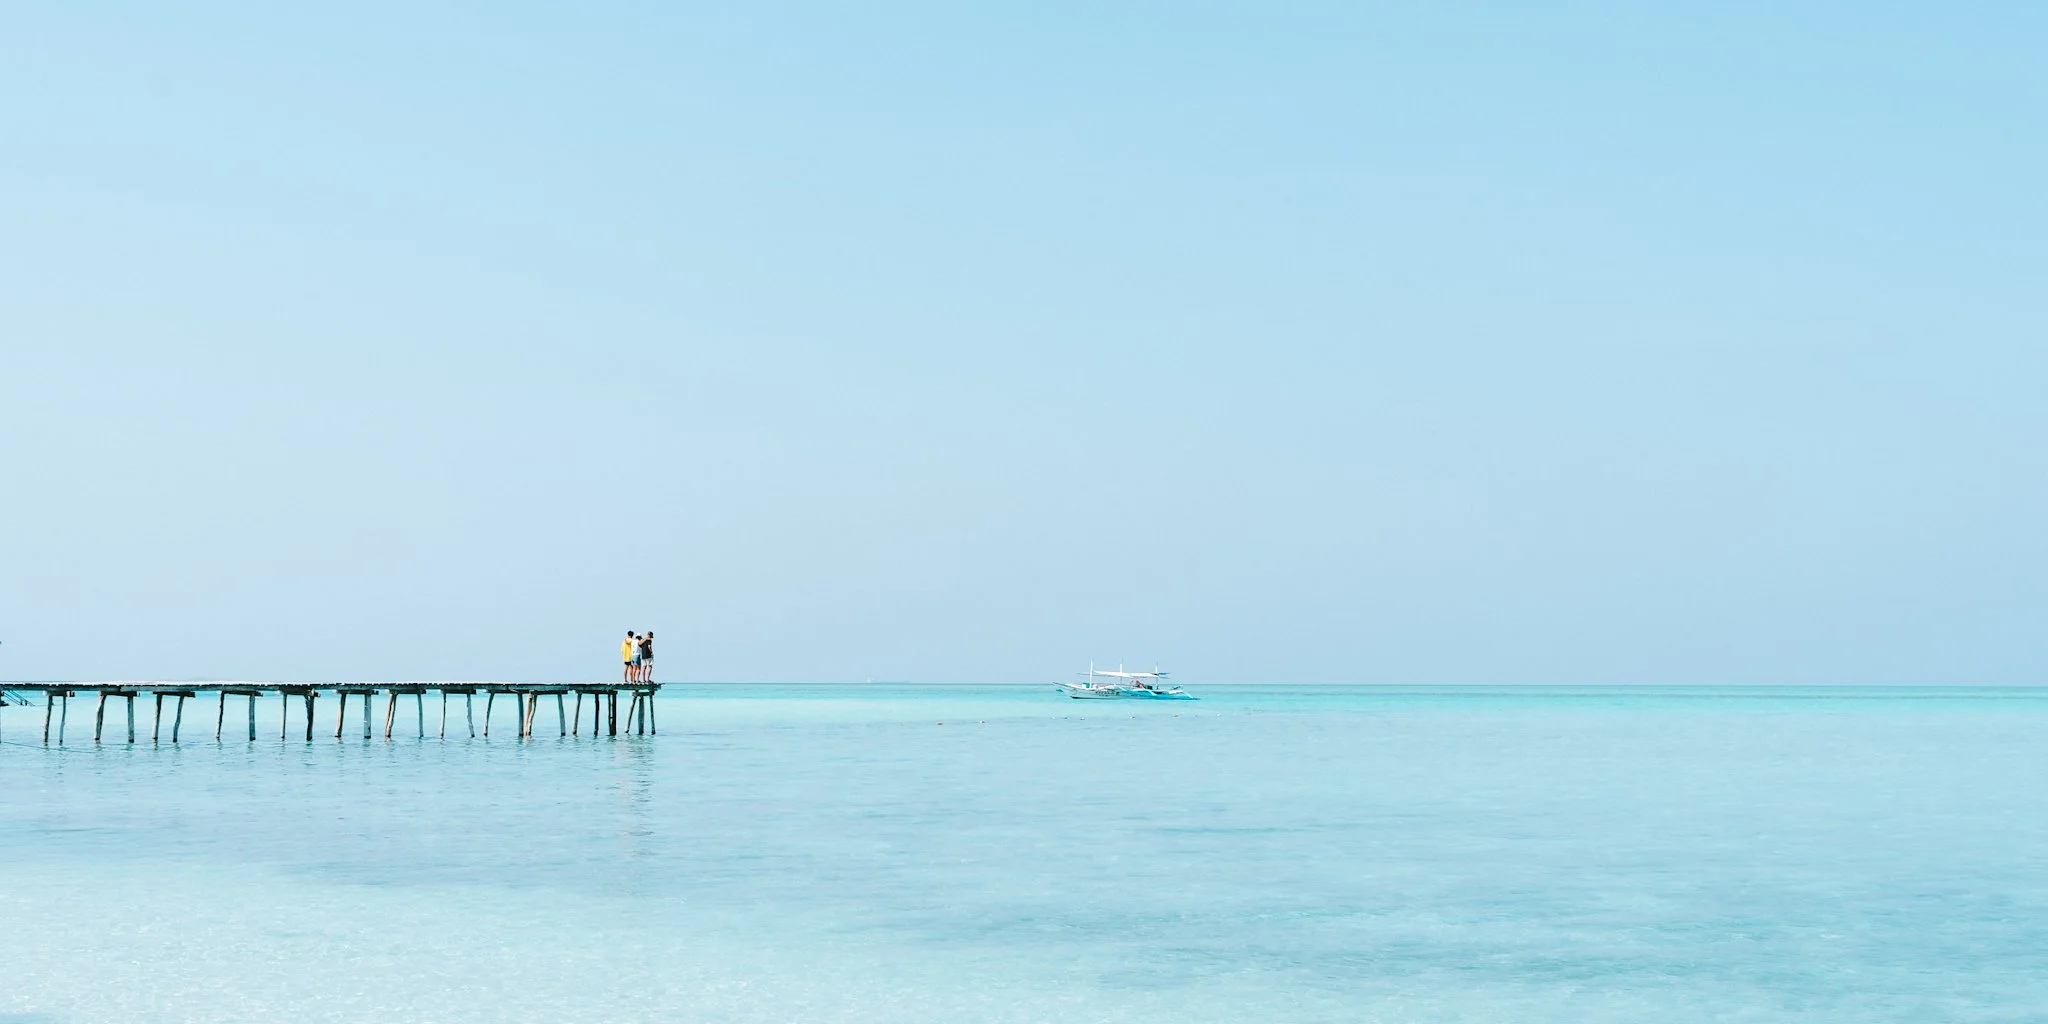
In this example, taken on the paradise Onuk Island, Balabac, there is nothing in the frame other than a small wooden pier on the horizon line, three people and a boat.
Why does this work? This image provides the scale and natural beauty of the water around the island without much going on. The pier and people sit at roughly the left third of the frame, with the boat at center-right - a classic rule-of-thirds composition that creates natural visual flow across the image. The wide, empty sky occupies the top half, giving the image enormous breathing room and you can feel the vastness. The small human figures at the end of the pier are the emotional anchor - they make the ocean feel infinite and you imagine yourself in the same place. It’s effectively a monochromatic image, making it feel very calm and serene.
Key point: Context without distraction. Use minimal compositions to give your travel photos emotional impact and help them stand out from the rest that try to cram in too much detail. Isolate figures and colours, don’t be afraid of leaving out details. What you can’t see in this image is the dozens of other tourists behind me.
Bonus: Focus on real life.
This is one that is close to my heart. All too often, travel photography leads people down the path of similar beautiful destinations. The three tips above will help your photos stand out from the rest, even in popular places, but this bonus tip is slightly different.
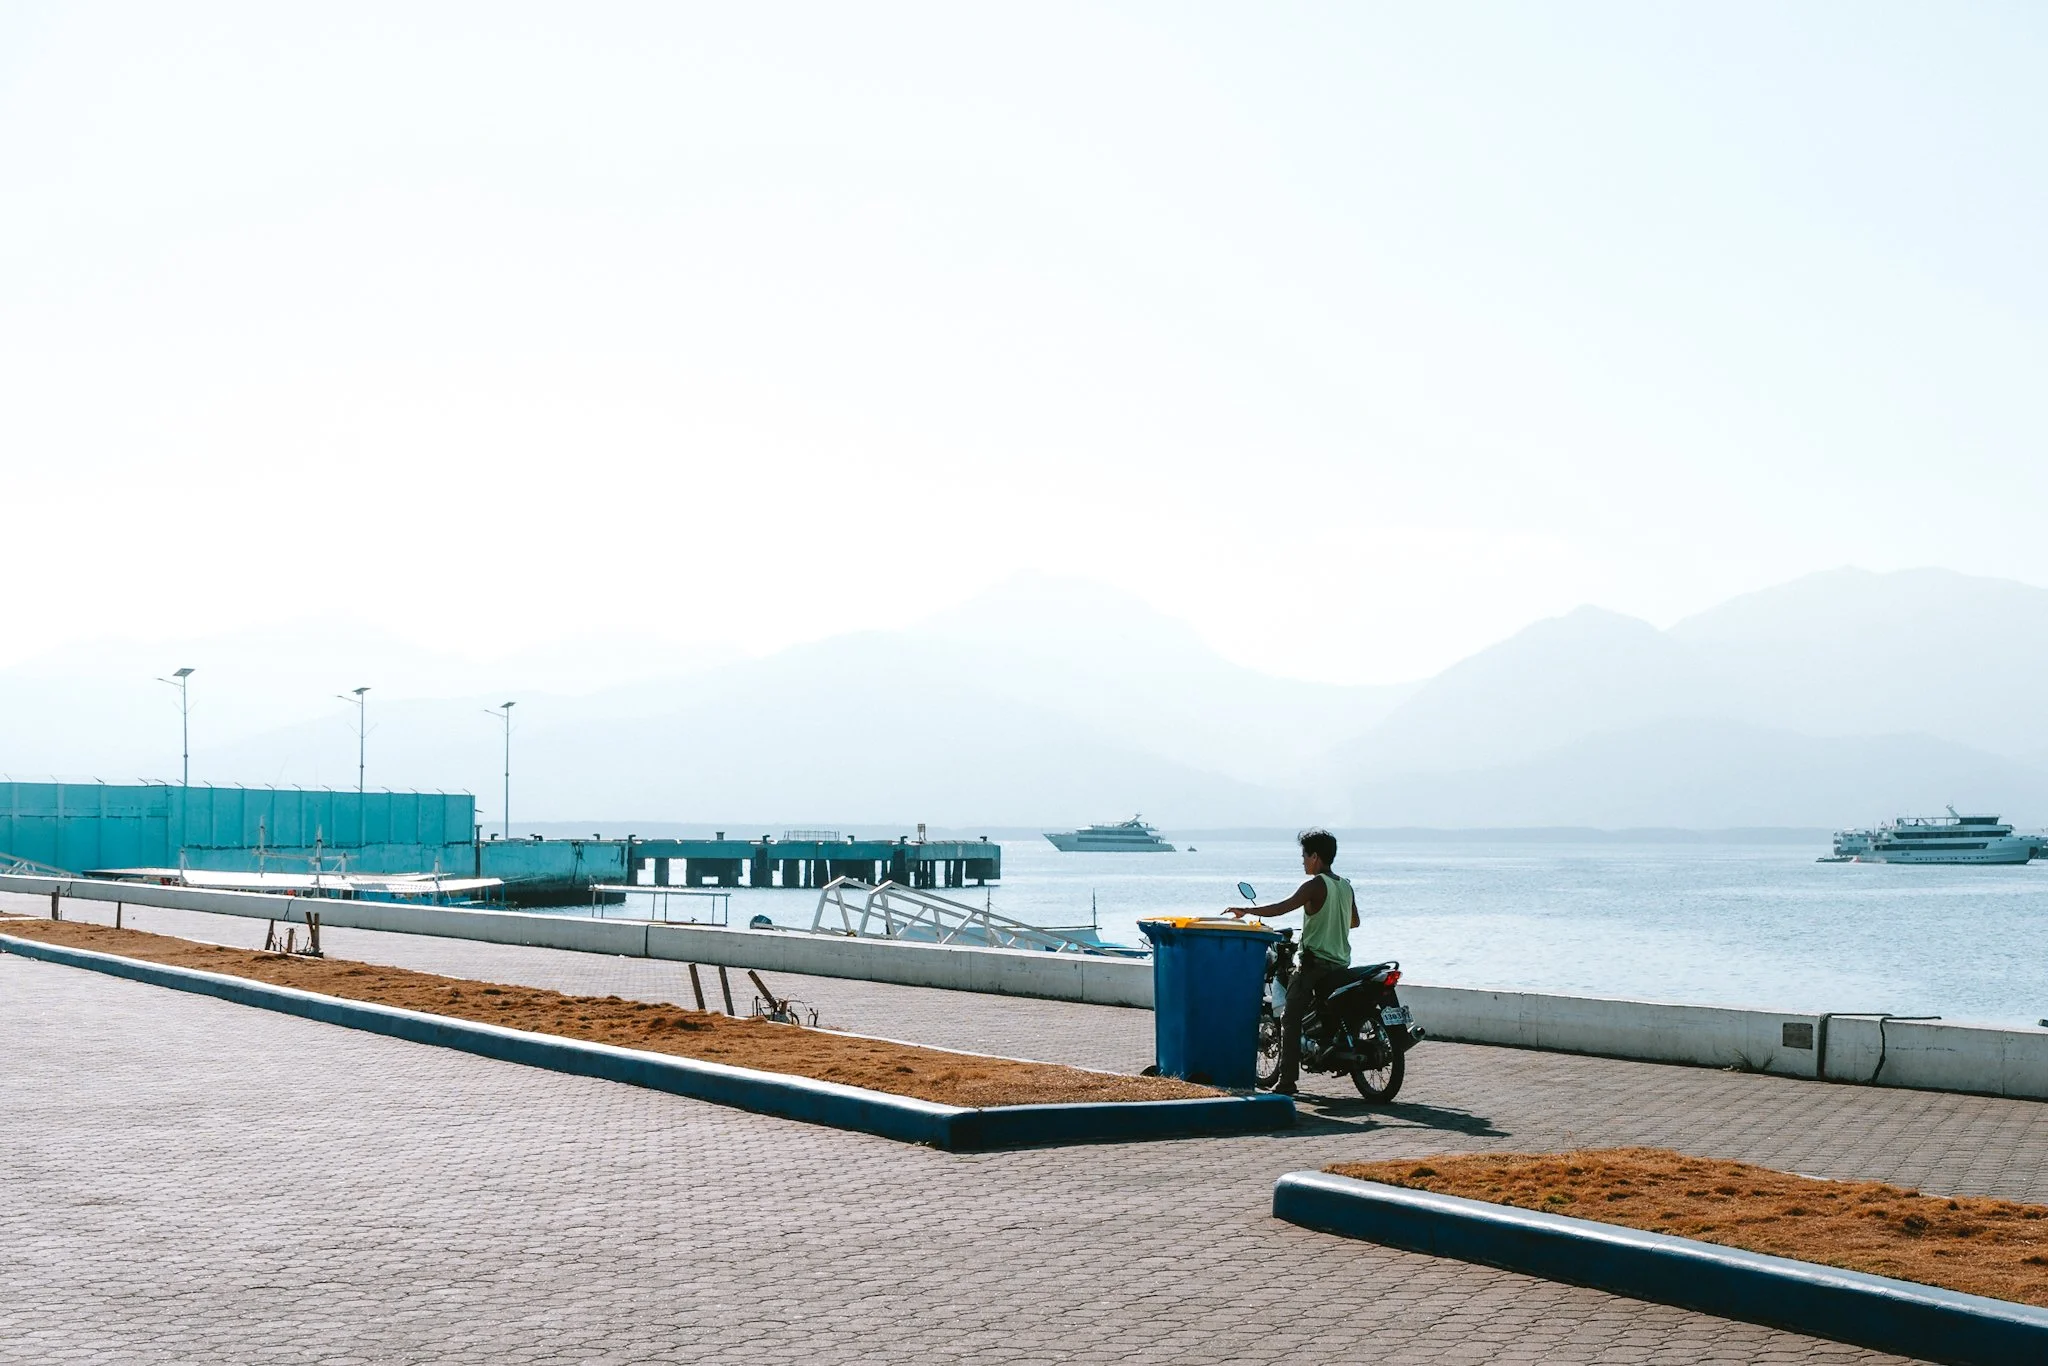
Practice turning your camera the other way. Take photos of not so beautiful things. Take photos of people doing real stuff. Like this image above, where a motorcyclist along the front of the harbour in Puerto Princesa stops to put something in a dustbin.
Most photographers wouldn’t dream of taking pictures of dustbins in Palawan, but I did. I took it because it made me ask questions. Why did this person stop at the bin on a motorbike? Why is he even on a motorbike in a pedestrianised area? Why that bin, and not any of the others he’d have passed by on his bike?
Drone shots of influencers paddling in the shallows isn’t original and it isn’t real life. Don’t forget to capture real moments on your travels.
Conclusion
By applying the tips above, you’ll have a much better chance of standing out and competing against the tide of insufferable Instagram influencers. You can return from your travels with a suite of unique images that you can be proud of. I certainly feel that way about what I’ve managed to produce from Palawan. I also feel rather smug knowing I didn’t send a buzzing drone up to capture any, annoying everyone around me and the birds in the process.
If you have any other tips that you think would help, please get in touch or tag me in your photos on Instagram (I’m @dannyclarkephoto).
Don’t forget to sign up for email updates using the form below - it’s the easiest way to keep up to date with new blog posts, gear changes, travel updates and new products.
Happy travels!
Danny.