My Sony A7C II Camera Settings for Travel and Street Photography (2026)
Heads up: some links on this page are affiliate links, meaning I may earn a small commission if you make a purchase — at no extra cost to you. This helps keep the content free and the adventures going. I only ever recommend things I’d use myself.
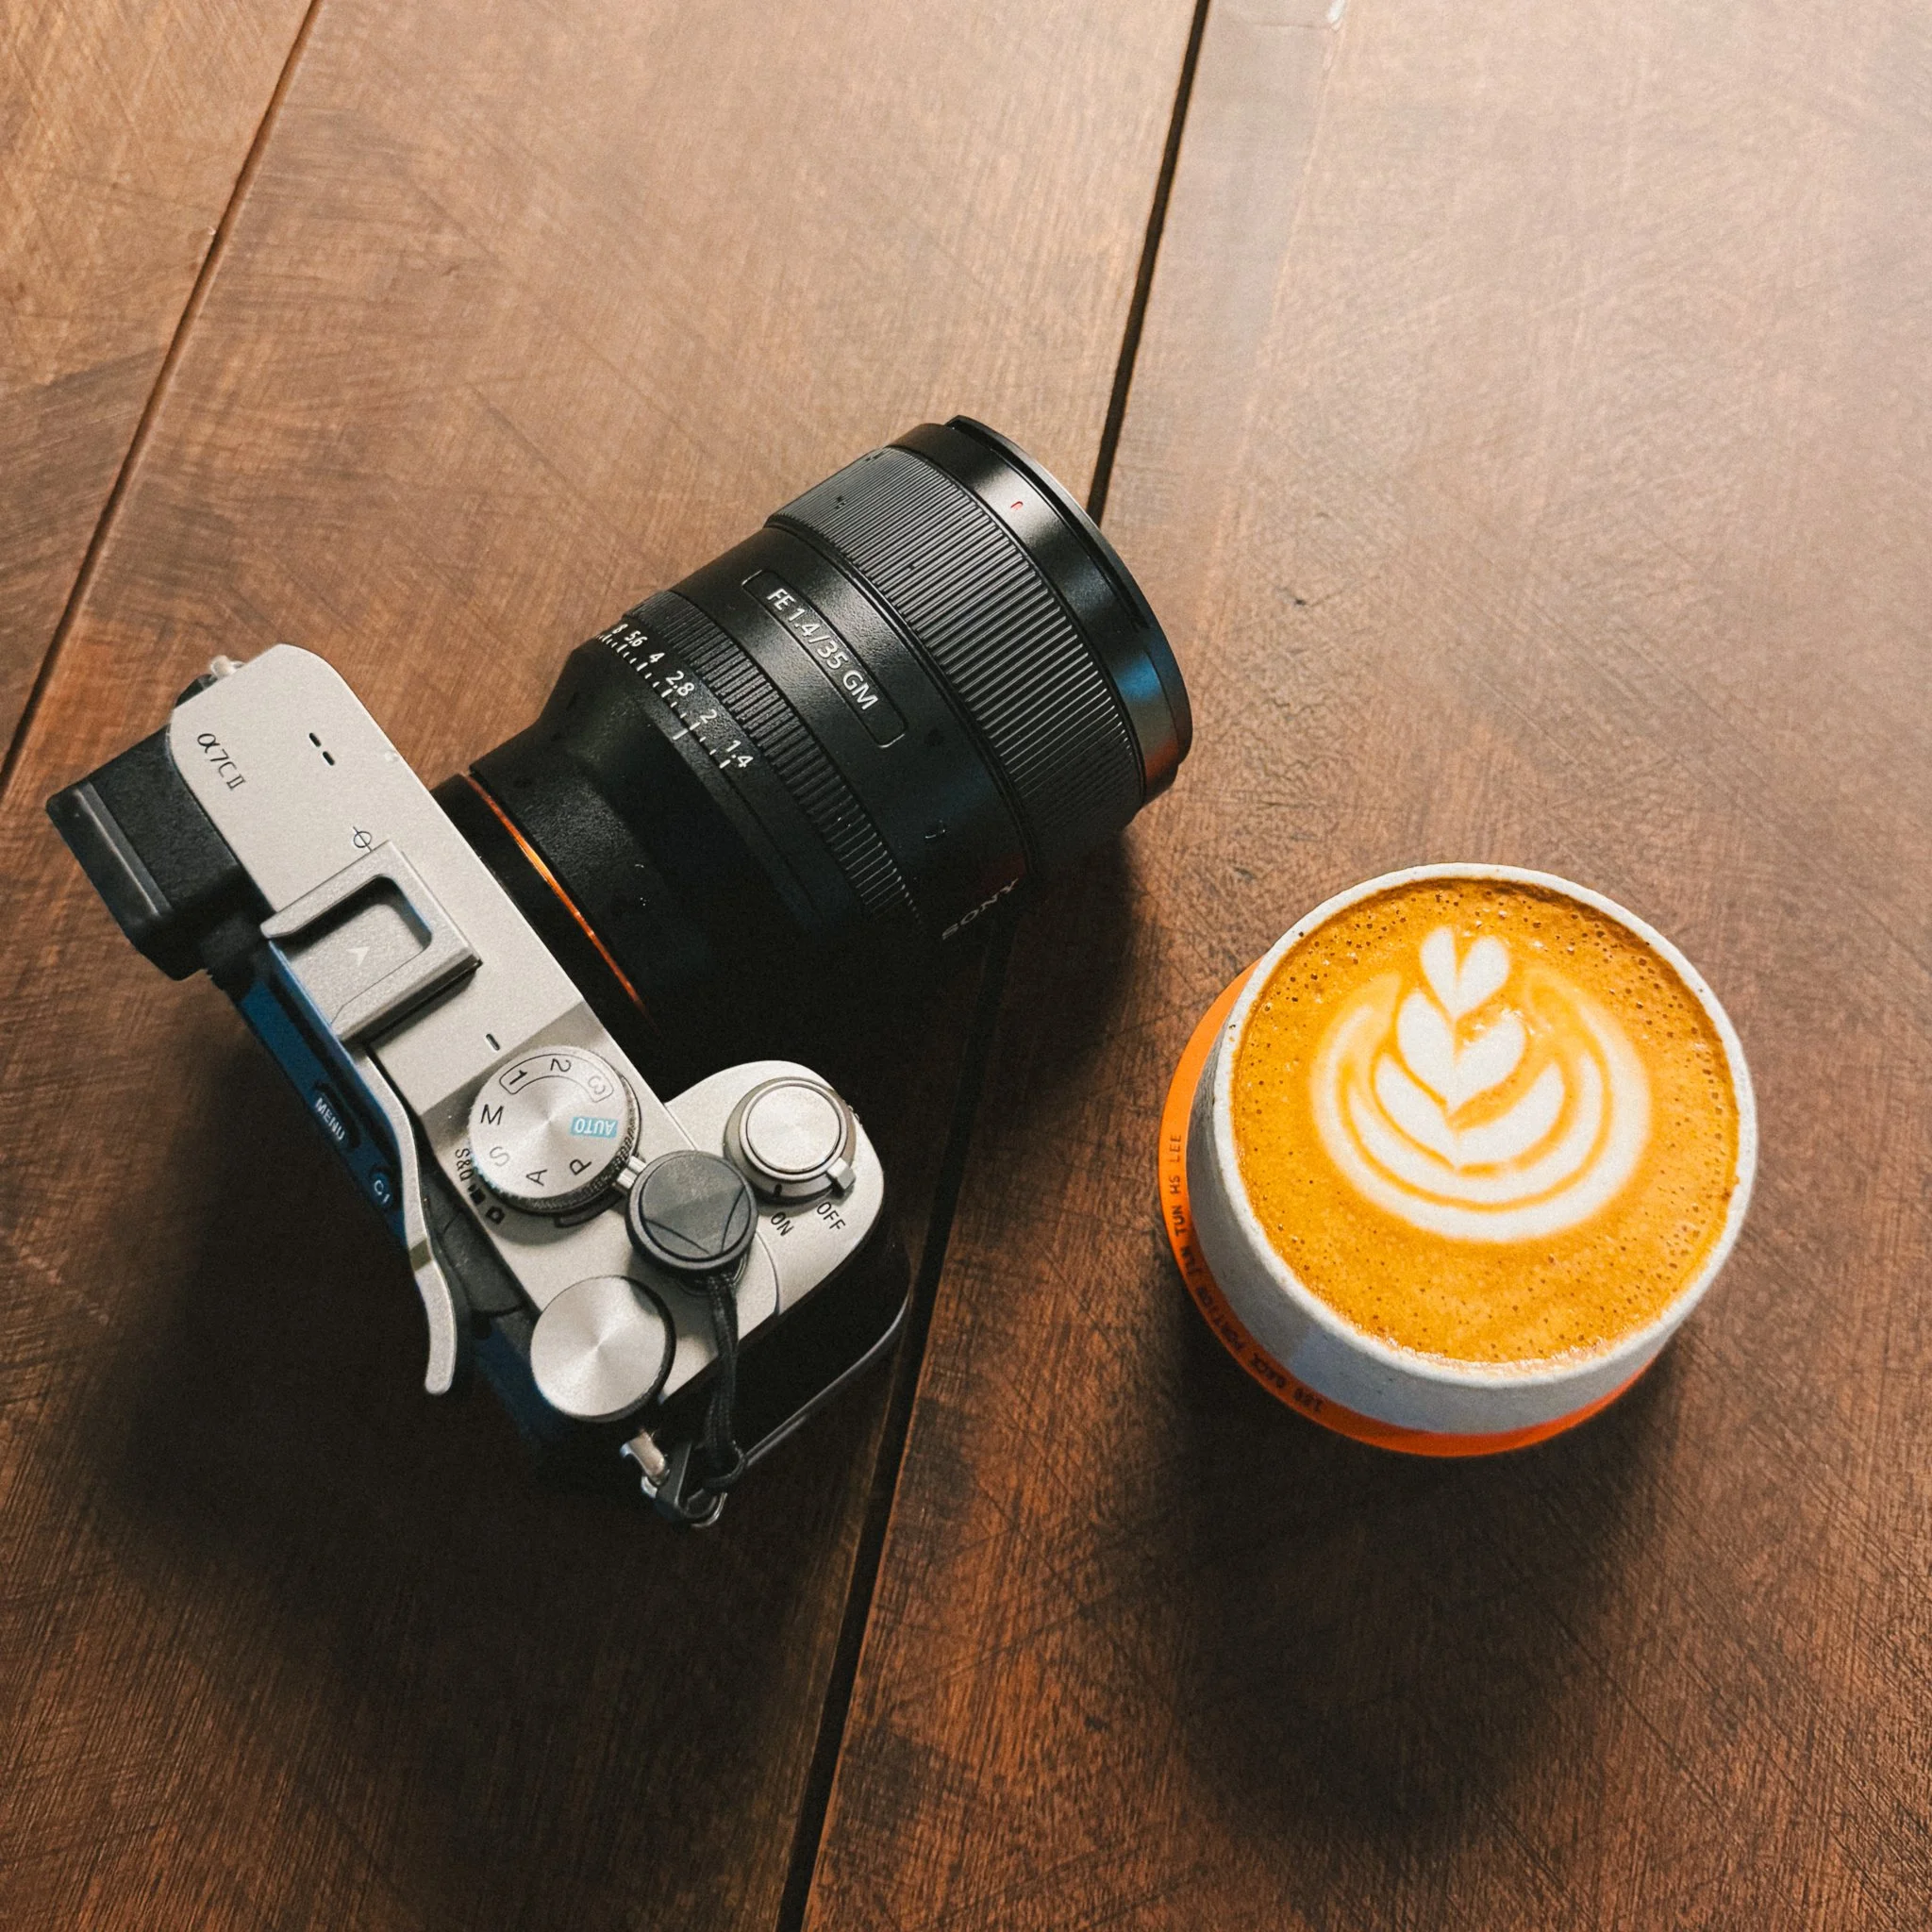
The Sony A7C II is the perfect full frame travel and street photography camera. It’s a compact and lightweight set up that delivers excellent results for me as I travel around the world, no matter what I choose to shoot. Travel and street photography is notorious for facing dynamic and changing conditions, and after 6 months of full time travel, I've now got my camera set up so that it gets out of my way, and allows me to concentrate on what’s in front of me.
However, this is a Sony camera. There are so many settings and options to choose from, it can be very overwhelming when you first dive in. In this blog post, I want to share how I’ve set up my Sony A7C II, from custom buttons to memory profiles and more.
Please don't leave it in Auto - grab a coffee and read this blog to give you a starting point that allows you to get the best out of this fantastic little camera.
(Side note - this post is photography-based only, and will therefore not cover any video settings)
Get stuck in
First, I would highly recommend getting used to the vast menu of options that this camera has available. Go in and play around with the menus, and see what happens. It takes time to get used to everything, but I’ve found this is one of the best ways. My favourite menu feature of the Sony system is that you can highlight a menu option and press the “Trash” icon for more information. They’re not always brilliantly descriptive, but they can help give you a little more of an idea of what a setting does if you’re stuck.
One more point, I'm not going to tell you exactly how to change all of these settings either. This post would be too big, and there are plenty of videos and articles (including Sony's own help guides) that can do that job. I have a link to the Sony help guide at the bottom of the page.
Main Shooting Modes
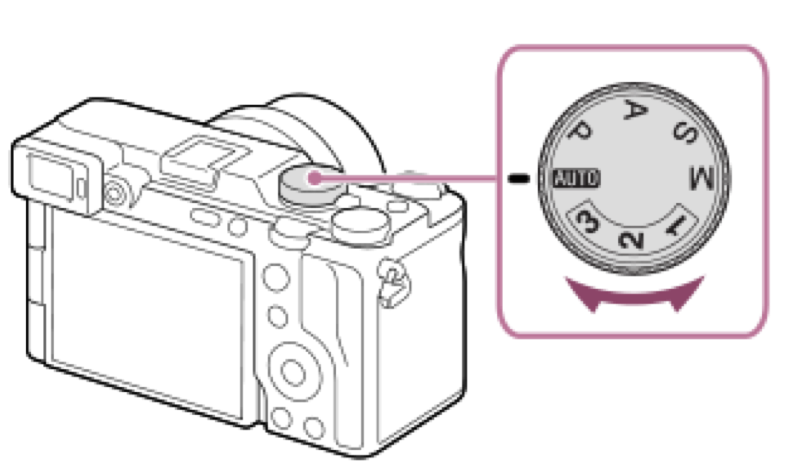
The main mode dial on the A7C II - don’t leave it on Auto, please!
I only use the custom memory recall modes on the main settings dial. There are three to set, and I have them set up with the following main exposure settings:
Memory 1
For every day shooting. This is my default that I refer back to whenever I have changed any settings for something specific. Used 99% of the time.
Aperture Priority (A) + Auto ISO Minimum Shutter Speed @ 1/250s
Subject Recognition - Human
Memory 2
For motion panning and intentional camera movement shots. Used 0.9% of the time.
Shutter Priority (S) - Shutter Speed @ 1/15s
Auto ISO
Subject Recognition - OFF
Memory 3
For freezing fast moving objects (wildlife, cars, water etc). Used 0.1% of the time.
Aperture Priority (A) + Auto ISO Minimum Shutter Speed @ 1/1000s
Subject Recognition - Auto
One of the big benefits of shooting in this way is that you can change settings on the fly depending on the situation, but instantly return to a known starting point by flicking to another mode and then back to Memory Recall 1 and you’re reset. Again, this allows you to focus your eyes and mind on the world around you, and not fiddling around with settings.
Imagine you’re in the street, shooting in your normal mode, but you see a person standing still with movement around them, where a slow shutter speed would create a compelling image. In full manual mode, you’d have to change three big settings (Shutter Speed, Aperture and ISO) to get the exposure and creative effect right and by that person, the person has moved on. Whereas I just switch to Memory 2, adjust the shutter speed very quickly as I need and fire away. Easy - and I haven’t missed the shot.
Custom Dials
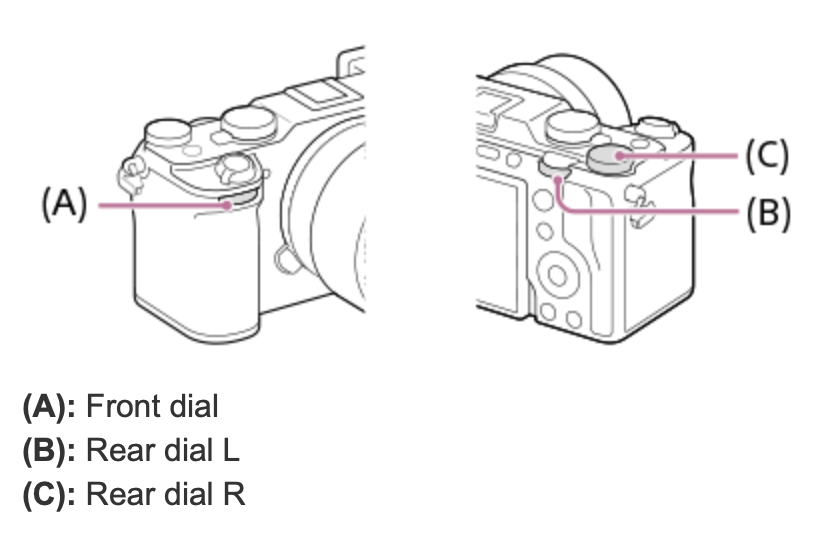
The Sony A7C II has four customisable dials or wheels for you to change to whichever setting you prefer. This is especially useful if you shoot in manual mode so you have access to all three of the basic exposure triangle settings: Shutter Speed, Aperture and ISO. I don’t shoot in Manual mode, however, so I have mine set out like this:
Front Dial: Shutter Speed
Rear Dial RIGHT: ISO
Rear Dial LEFT: Exposure Compensation
Control wheel: N/A
The elephant in the room here is that I have no aperture dial set - that is because I only own Sony lenses that have an aperture ring, so I do not need a separate dial to change my settings. If I had a lens without an aperture ring, I would make the Rear Dial Right my aperture dial, and revert ISO back to the Control Wheel.
I have nothing set as the D-pad for one key reason - it’s very easy to knock and change the settings without realising. I did this many times when I did have it set as the ISO wheel, and it resulted in some bad exposures.
The dial I use the most is undoubtedly exposure compensation. This is because I use Aperture Priority, Auto ISO and Min. SS almost all of the time. It’s also because I manually “over-expose” in flat light, and manually “under-expose” in situations where I want to darken shadows and expose for the highlights. Modern Sony cameras do have a “highlight” metering mode, but I prefer to do it quickly and manually with my thumb using the dial.
Standard Settings
Auto ISO + Min. SS
The Auto ISO and Minimum Shutter Speed setting has been a real game changer for me. It’s exactly as it says - it keeps the ISO in auto (between your set range, see below), but allows you to set a minimum shutter speed depending the subject you’re shooting. (One thing to note, is that the camera WILL prioritise lowering the shutter speed if you’re underexposed, not increasing the ISO beyond your set range.)
This setting has completely removed any need for me to shoot in manual. Your main control is the aperture ring (or dial), and once you have set the aperture as you need it and you’ve made sure shutter speed is set as you require for the subject, you can let your eyes and shutter finger do the rest. Give it a go, you might just find your new favourite way of shooting.
ISO
My Auto ISO range:
ISO 100 - 12800
Modern sensors are fantastic, and I trust this Sony A7C II up to an ISO of 12800. I should probably raise this even higher given the advancement in AI denoise software, but I’ve never had any issues so far at these settings.
Autofocus
I keep the camera in AF-C (continuous AF) at all times. Travel and street photography is unpredictable, so this is the best global setting for me. AF point wise, I set it to Tracking: Wide and let the subject recognition do the rest. The AI aided AF system in the A7C II is exceptionally good, but even still, I do use the “focus and recompose” technique very often due to the lack of a joystick to manually select a focus point, and the fact that a lot of my images don’t always have an AI-worthy subject to focus on. The lack of a joystick means I use the AF-ON button to help with my focus. This is discussed further below.
White Balance
I set the camera to Auto WB at all times. Because I shoot in RAW, I see no reason to have WB set as anything other than Auto, as you can change it as much as you like in post. It’s one less thing to think about.
File Types
As I’ve just mentioned, I shoot in uncompressed RAW, and I do this at all times. I don’t think this needs to be complicated, providing you do edit your photos in some way. I have not tried any of the lossless compressed RAW file types as it’s not something I need to worry about as I use 256GB SD cards and I don’t keep every photo I ever take on my devices or cloud storage. I wouldn’t advise anyone shooting in JPEG on a camera like this, unless there is a very specific workflow that requires it.
Metering Mode
I use multi-metering mode at all times. This is because I manually adjust my exposure compensation for a particular lighting condition or creative effect using one of my custom dials.
Drive Mode
I have this set to Continuous Shooting: Mid for most scenarios. I don’t need 10fps for the kind of things I do. I certainly don’t need 30 shots of the same 3 second moment that I have to sift through later. The 6fps of the MID setting is more than enough to capture fleeting moments, and doesn’t feel slow and clunky like a single shot drive mode.
IBIS (In-body stabilisation)
IBIS is very useful in low light situations or with longer lenses, but I don't tend to push the boundaries of handheld long shutter speeds or sports/wildlife where it has a greater impact. That said, it is always set to SteadyShot ON and I never change it.
Custom Buttons
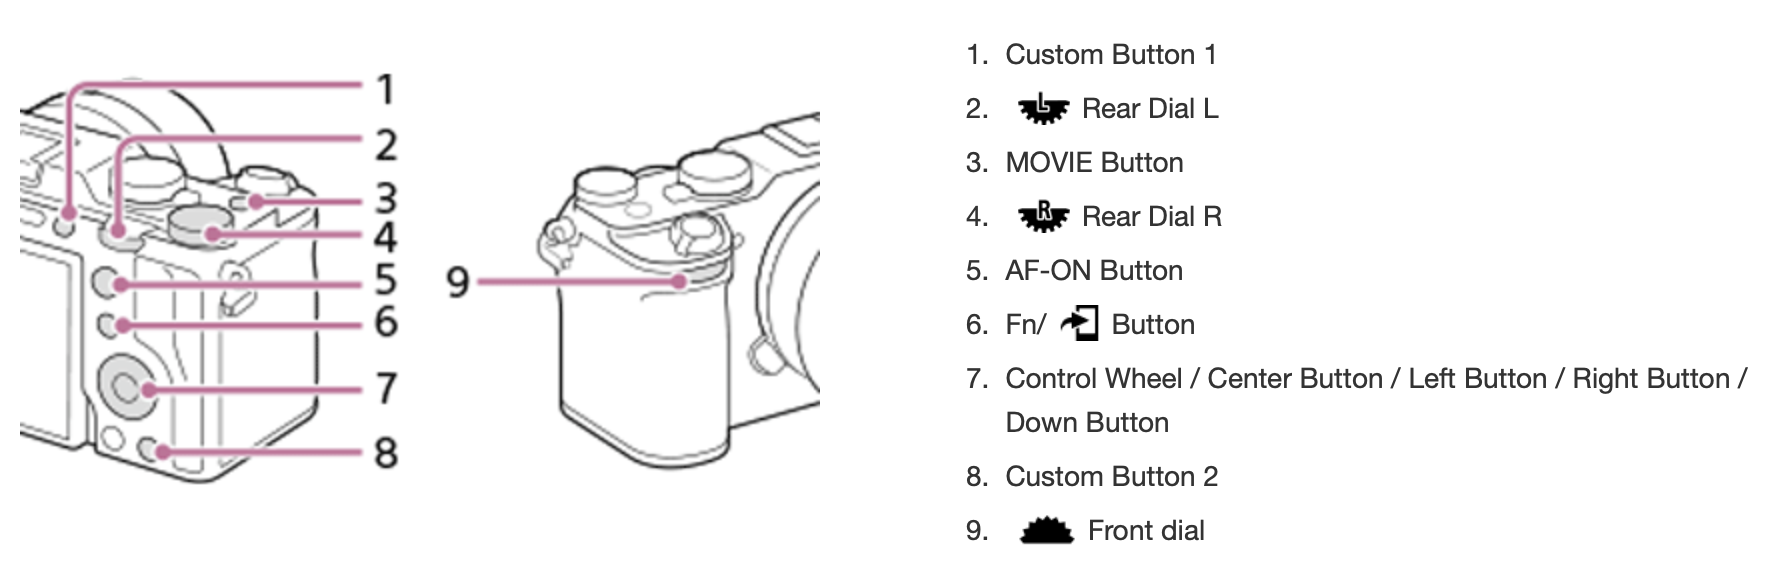
Dials covered above!
The Sony A7C II has two official custom buttons denoted as C1 and C2. I say “official” because with any Sony camera, you can customise pretty much all of the buttons to do pretty much anything. The choices are therefore overwhelming, but here’s how I have my custom buttons set up around the camera for quick and easy access to the most important settings. The most important thing for your camera is that it allows you to take photos, not keep you occupied playing with settings.
Custom Button 1 (C1)
I have C1 set to cycle between AF subject recognition target. This might seem an odd choice given my style, but it’s one of the most common things I cycle through. The most common example is quickly switching from Human to Animal to snap a street dog or cat. The reason this major custom button is set for something relatively minor is because the rest of the camera is already set up to require minimal tinkering.
Custom Button 2 (C2)
This is set to toggle APS-C crop mode. Because I use primes, this gets used quite a lot so I can punch in when I need some extra reach. The resolution is still around 14-15MP, which is plenty enough for normal image use. It’s very handy in lots of situations.
AF-ON button
This is likely my most used button other than the shutter itself. This is set to Tracking On [-] + AF ON. When I press and hold this button, it spot focuses on the centre and tracks it. This allows me to focus and recompose or I can set the AF to my subject and allow it to move in the frame and the AF will stick.
Although I’ve found a method that works, this is the main issue I have with the A7C II. Because there is no joystick, there is no way to really quickly move your AF point around manually. There is the use of the touch screen, but when the camera is up to your eye, it’s really laggy and feels like it’s just too sluggish to work. That and my thumbs aren’t huge, so I can’t easily manipulate the focus point with any great accuracy. There is the odd occasion where my focus and recompose doesn’t quite work as I intend, such as the AF sticking to a passing car when you want it to remain on the shop front on the other side of the road.
Lens custom button
Both of my Sony lenses have a custom button, and I use this to toggle the camera into manual focus mode. Having MF instantly available is incredibly useful when shooting through glass, playing with reflections, shooting diffused light (like plastic sheeting at night markets) and other weird situations where the AF doesn’t know what to do. When I press and hold, all AF is turned off, and I can manually adjust the focus with the lens focus ring. When I let go, all of my original AF settings return. I also have Peaking Display set to On, the Peaking Display Level set to High and the Peaking Display Color to Yellow. This just helps quickly highlight which areas of the frame will be in focus when in MF mode.
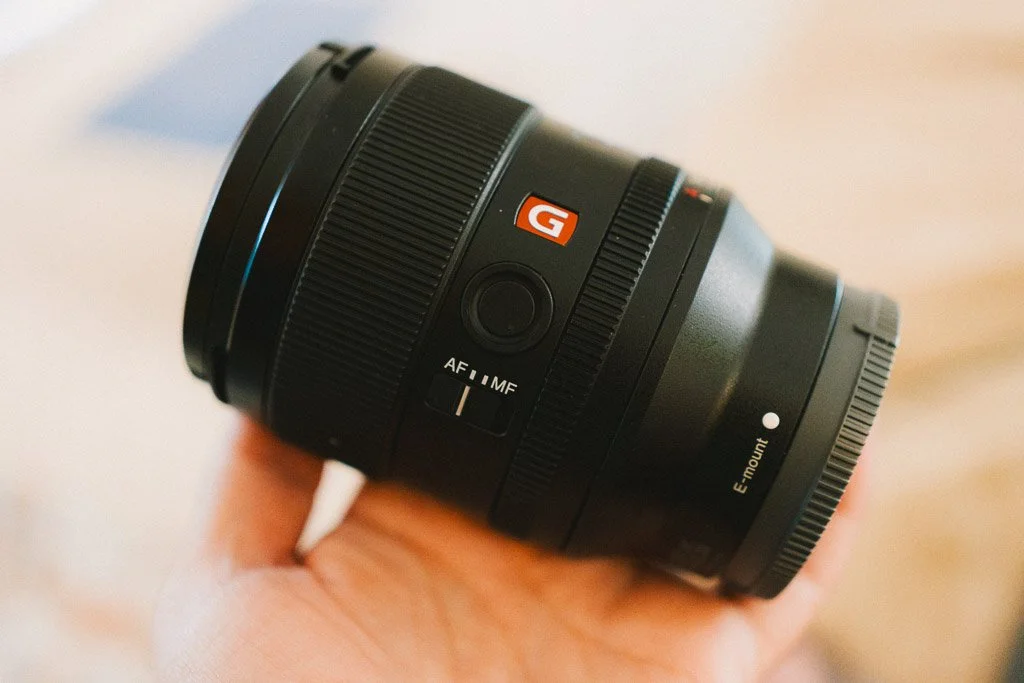
The custom button of the Sony 35mm GM F1.4
Control Wheel LEFT
This is set to Drive Mode, which is the default. On the odd occasion I need to use a timer, or the even rarer occasion I may want to use a higher fps speed.
Control Wheel RIGHT
This is set to be able to change the Auto ISO + Min. SS setting. If I need to make sure I can freeze the action, or slow the shutter speed down in lower light, here is where I do it on the fly. Press the right hand side of the D-pad and scroll the wheel to move up and down the menu. Simple.
Control Wheel DOWN
One of my favourite settings - toggle silent mode. This comes in VERY handy when you are somewhere quiet and you need to be discreet. A simple toggle on and you enter electronic shutter mode, which, providing you’re not shooting fast shooting action or panning a lot, is very handy.
Control Wheel CENTRE
Set Focus Area. As discussed above, I don’t tend to change my AF zone settings, but this is where I do it if I need to. Press the centre button once and it brings up the menu to change the AF zone.
Control Wheel UP is not customisable - it only cycles through the display options for the screen or in the viewfinder.
Other Bits
Display
I don’t like the distraction of having every conceivable setting and the histogram showing on my screen or in the viewfinder, but I do like having the internal gyroscope as a guide for taking level shots. I’d rather get it right in camera if I have the time, therefore not risking losing edges of the frame in post if my shot is not straight at all. I also have the Rule of Thirds grid on the screen as this always gives me a good starting point for composition. You may notice that the Rule of Thirds is a strong feature of my work. I am currently tempted to turn these off in order to push my creativity and make sure I'm the one making the decisions, not the camera.
Touchscreen
I turn off the touchscreen settings while shooting, as I find I can accidentally change things with my face whilst looking through the viewfinder. I prefer to feel and use real buttons and dials, but I understand this is a tactile, personal matter and yours might differ.
The Sony Help Guide is useful if you're just finding your way. It can be found here: https://helpguide.sony.net/ilc/2360/v1/en/index.html
Wrap Up
Hopefully this has given you some insight into what I've found to be the best settings for travel and street photography on the Sony A7CII. Custom dials and buttons are highly personal, but as I've already alluded to, having a camera set up in a way that it (almost) completely gets out of your way whilst shooting allows you to spend more time shooting and less time faffing.
Give some of these settings a go when you next take your camera out and see how you get on.
If you'd like to receive email updates on new blog posts, products for sale (prints, presets etc) then please sign up using the email form below.
If you're interested in the gear I use for full time travel photography, please visit this blog post or my gear page.