How to Take Better Travel Photos in Bad Light
Having a limited amount of time in travel locations means you don’t always get the photos you yearn for. Spending only a few days somewhere means you don’t get to see a place in all weathers, all times of day, and therefore - all types of light.
I do not do very well at early mornings. No matter what I try, I cannot seem to get up early to get out and capture one of the most crucial parts of a photographer’s day.
While I don’t tend to shoot too much in proper golden hour, the hours just after (or before in evenings) are my favourites. In Malaysia for example, the sun rises around 7am, meaning 8am - 10am are my sweet spot. If I don’t wake up til 9am, and I can’t function without a specialty coffee, I’ve missed the best of the light before the sun gets a little too high. Couple that with Malaysia’s often overcast skies, I am not surprised I didn’t get the best of the light whilst spending some time in the UNESCO World Heritage old town of Melaka.
So how do I take decent photographs if I’m walking around a new place in unfavourable conditions? Here are my top 3 tips to help you take better travel photos in bad light.
Seek colour
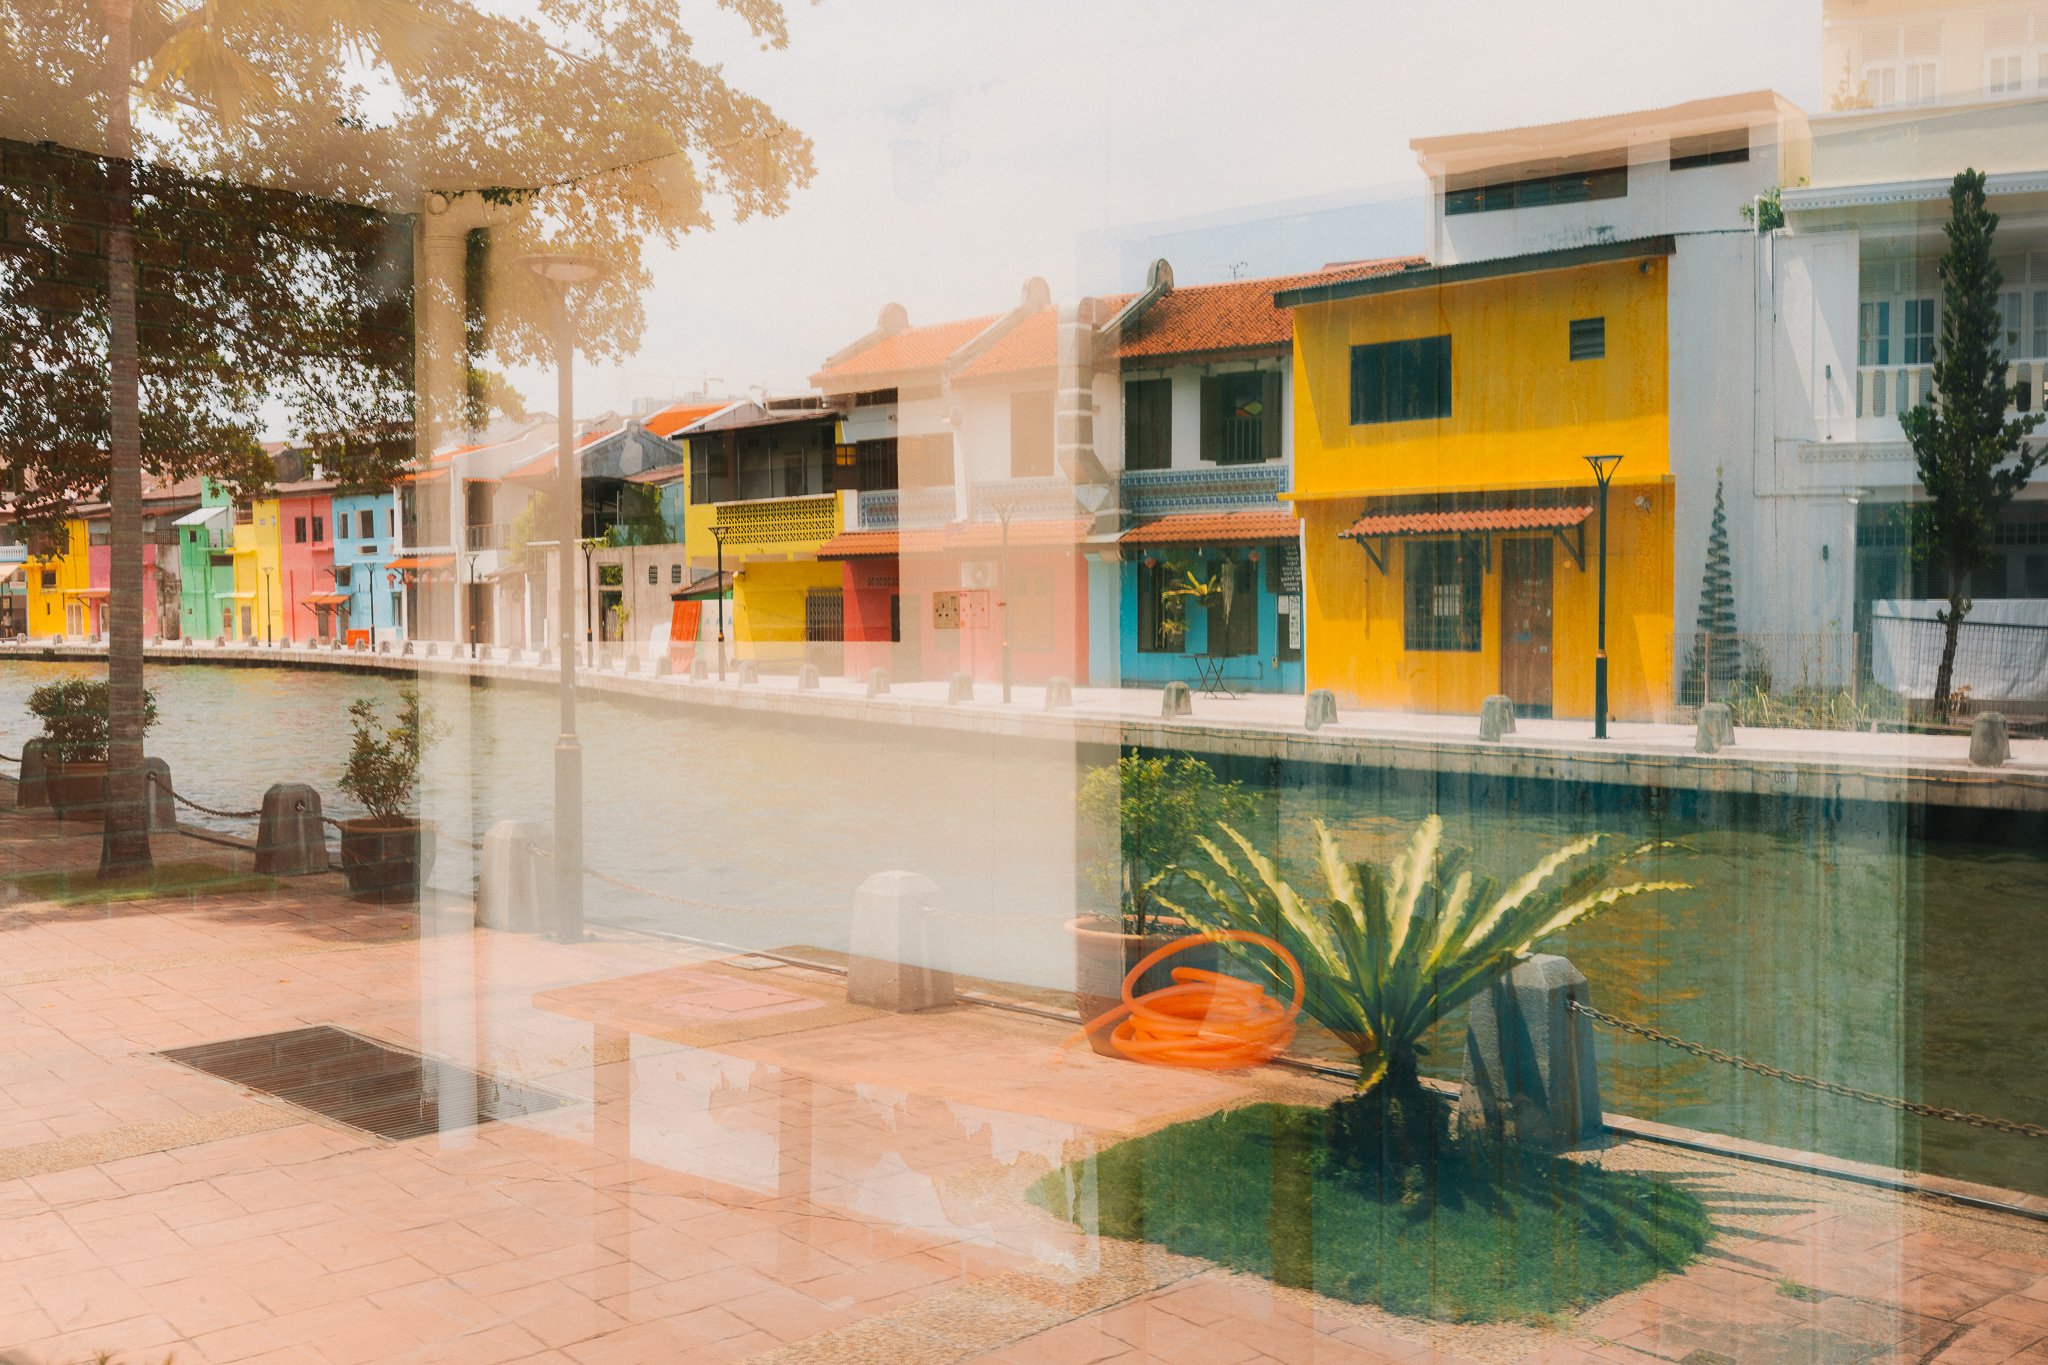
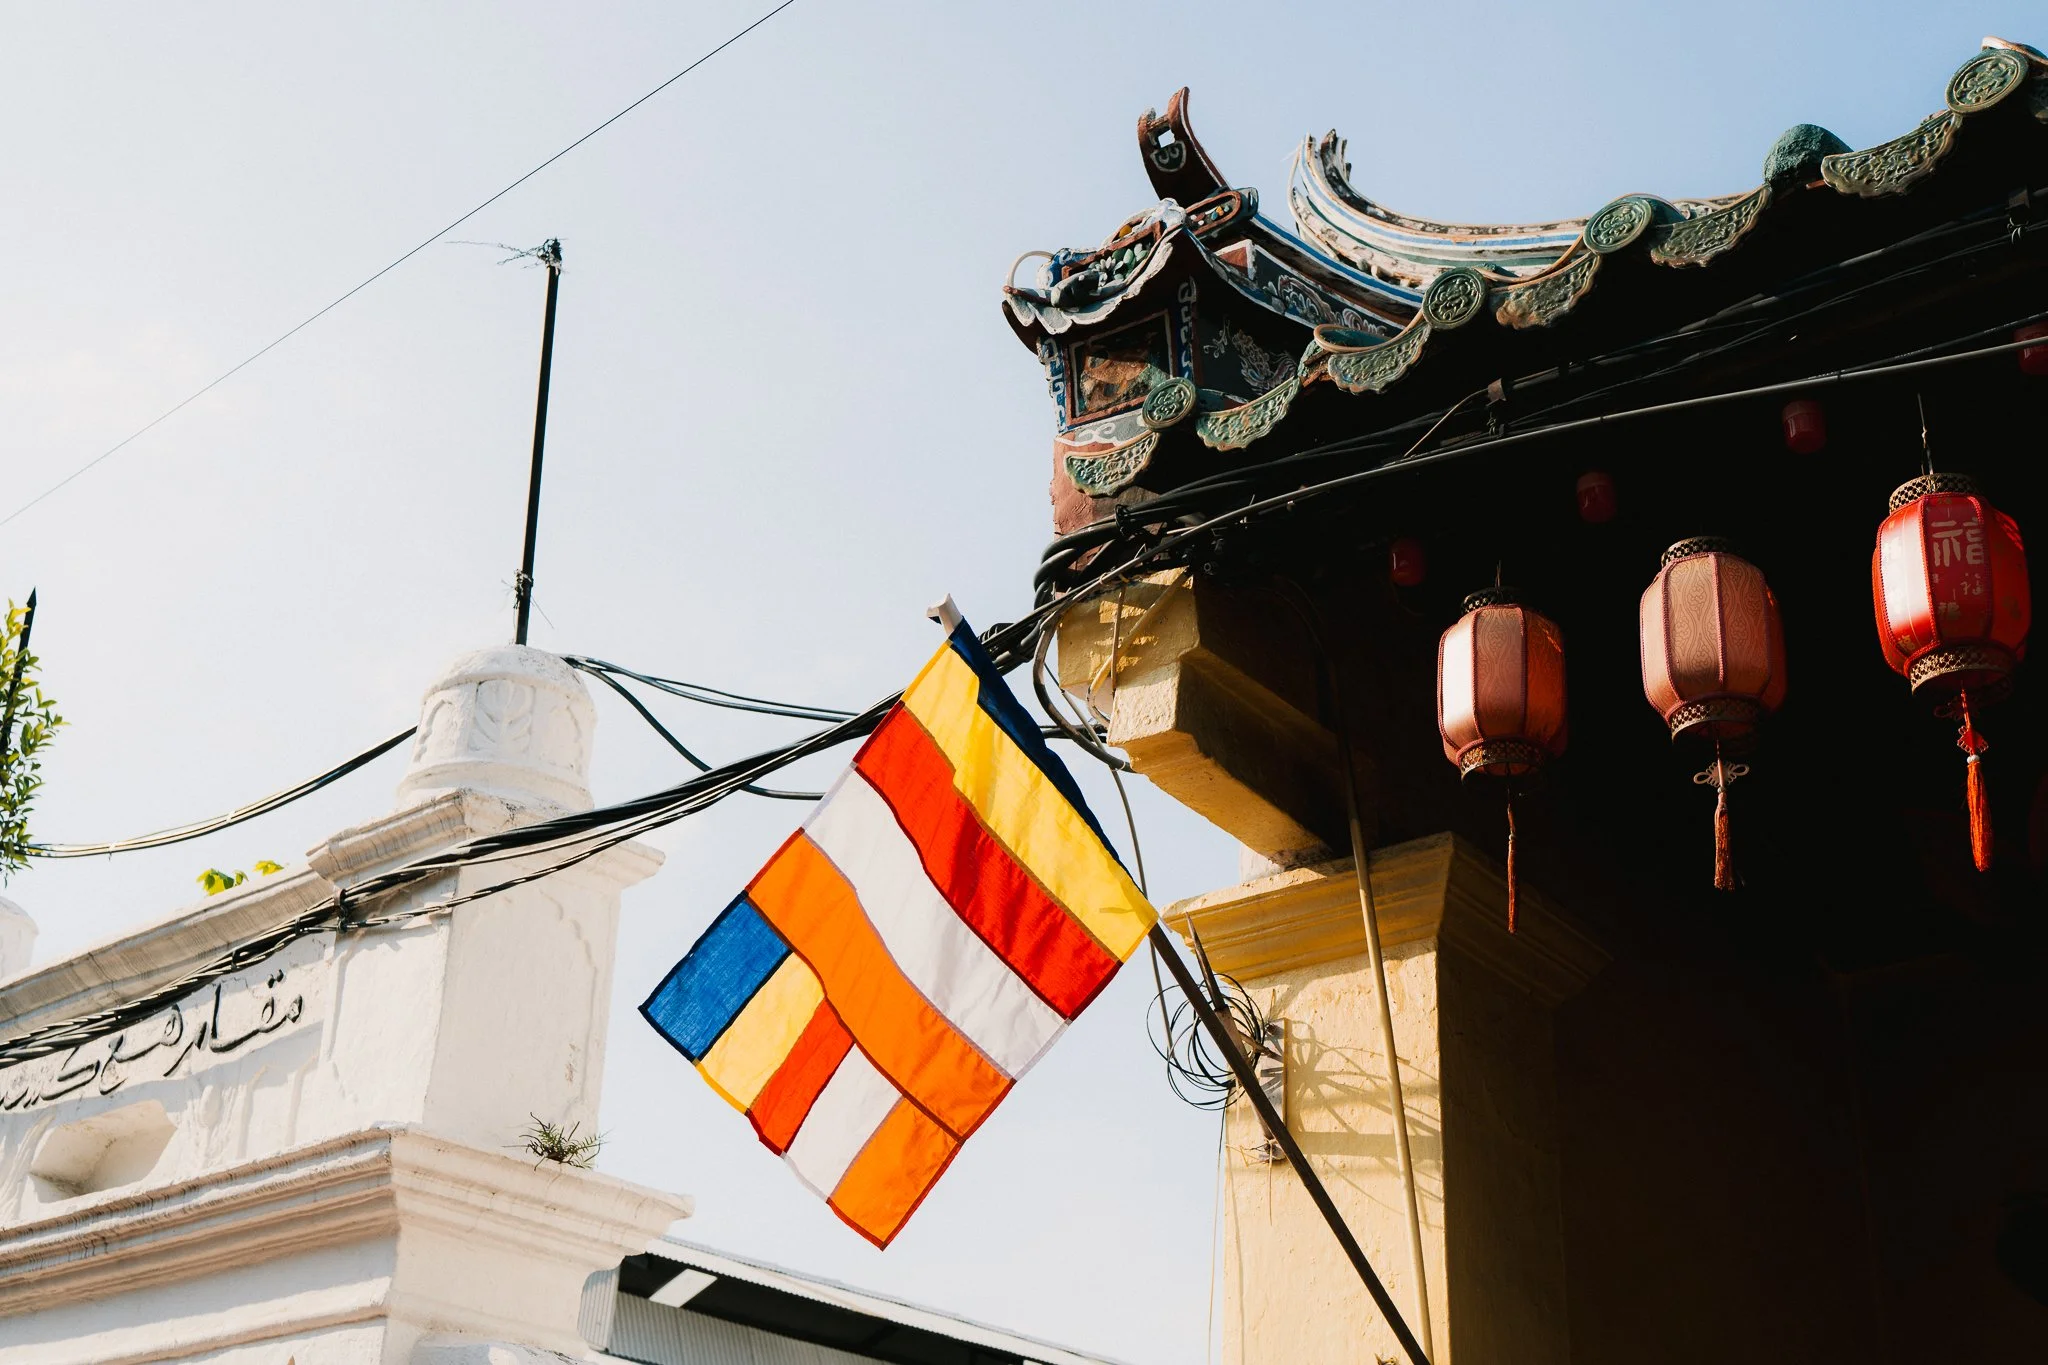
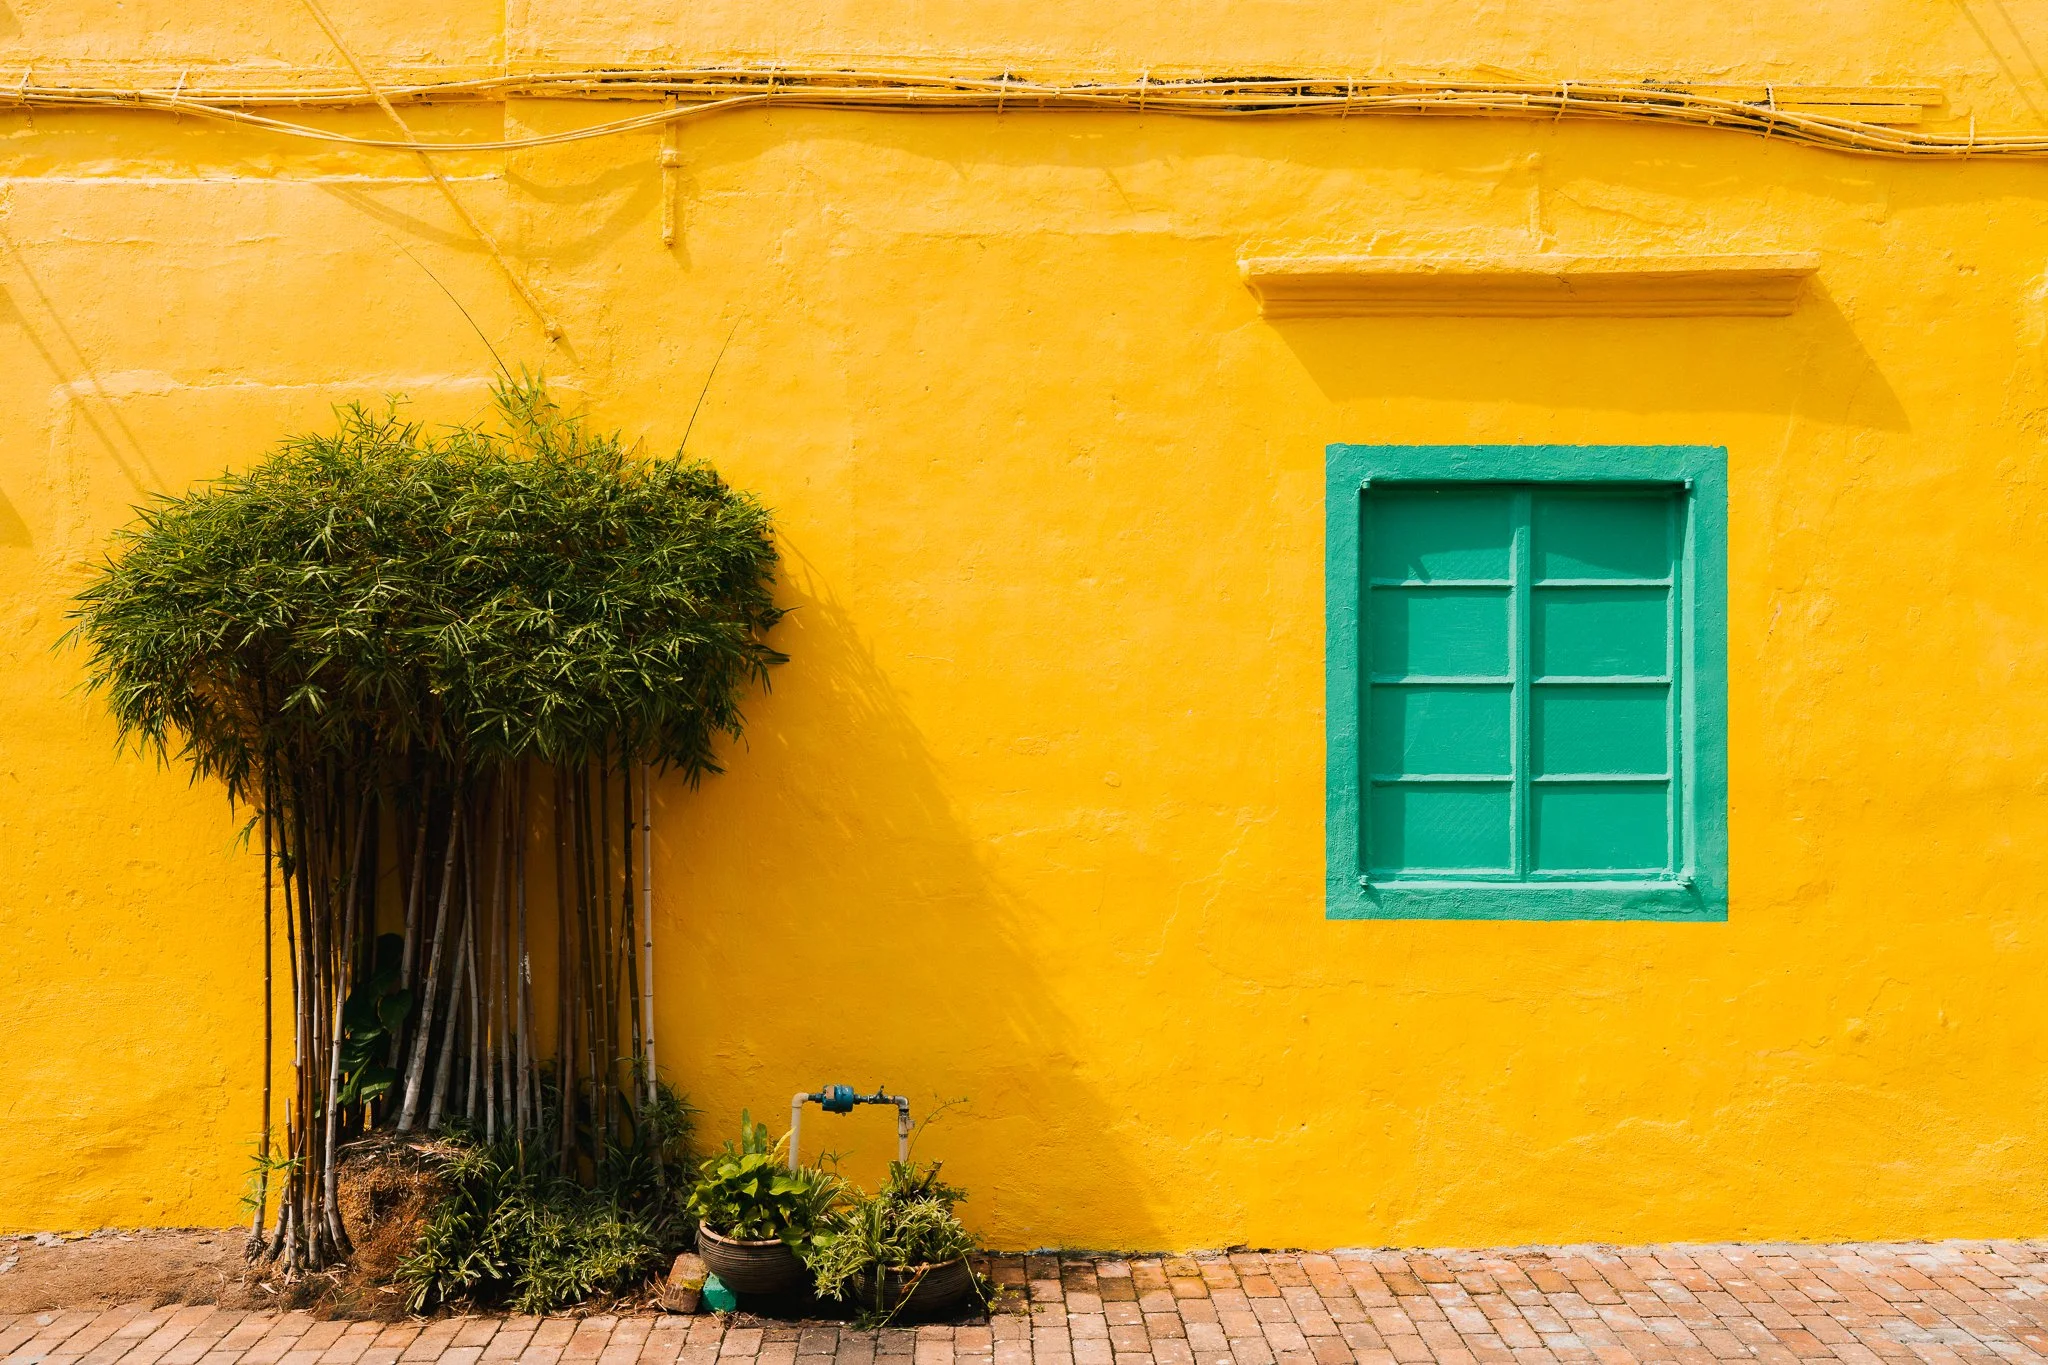
One of my favourite things to do is to focus on colour. As I write this, I am fortunate to be in Asia, and its rich cultures are awash with bright colours. This is very evident in the UNESCO World Heritage old town of Melaka. Buildings are painted bright yellow, pink, green, blue. There’s Chinese red everywhere, and don’t forget the lush greens that come with tropical climates.
Even just a small pop of colour in an otherwise uninspiring scene can draw the eye - traffic cones and lanterns are a great example of this. This is not exclusive to Asia. Even in the UK, where I call home, there is colour everywhere - if you train your eye to seek it out.
With harsh sun or overcast skies, I tried to focus on Melaka’s colours as I documented everyday life in the city. That way, I’ve come away with a set of photos that tell a visual story of the destination, but also something that I can claim as decent work.
Is colour more important than light? No, generally it isn’t - photography is still fundamentally all about light. But next time you’re somewhere with your camera and the sun is high in the sky, or there’s no dynamic lighting, look for colour as a trigger to lift your camera and press the shutter. I’m certainly glad I did in Melaka.
Find Contrast
The other thing I do is look for natural contrast.
More specifically, seeking out tonal contrast is one of the best techniques in street and travel photography when you are faced with poor light. Crucially, I am talking about real world contrast that is captured in the image, not contrast that is added in the editing stage.
As I have mentioned, I wake up too late and often find myself out shooting during the harsh hours of the day, with little to no decent light. Overcast skies are also a problem, and with a few days in one place, you can’t pick and choose when to head out to capture your destination.
That doesn’t mean your photos are going to be bad. Hopefully I have shown that here…
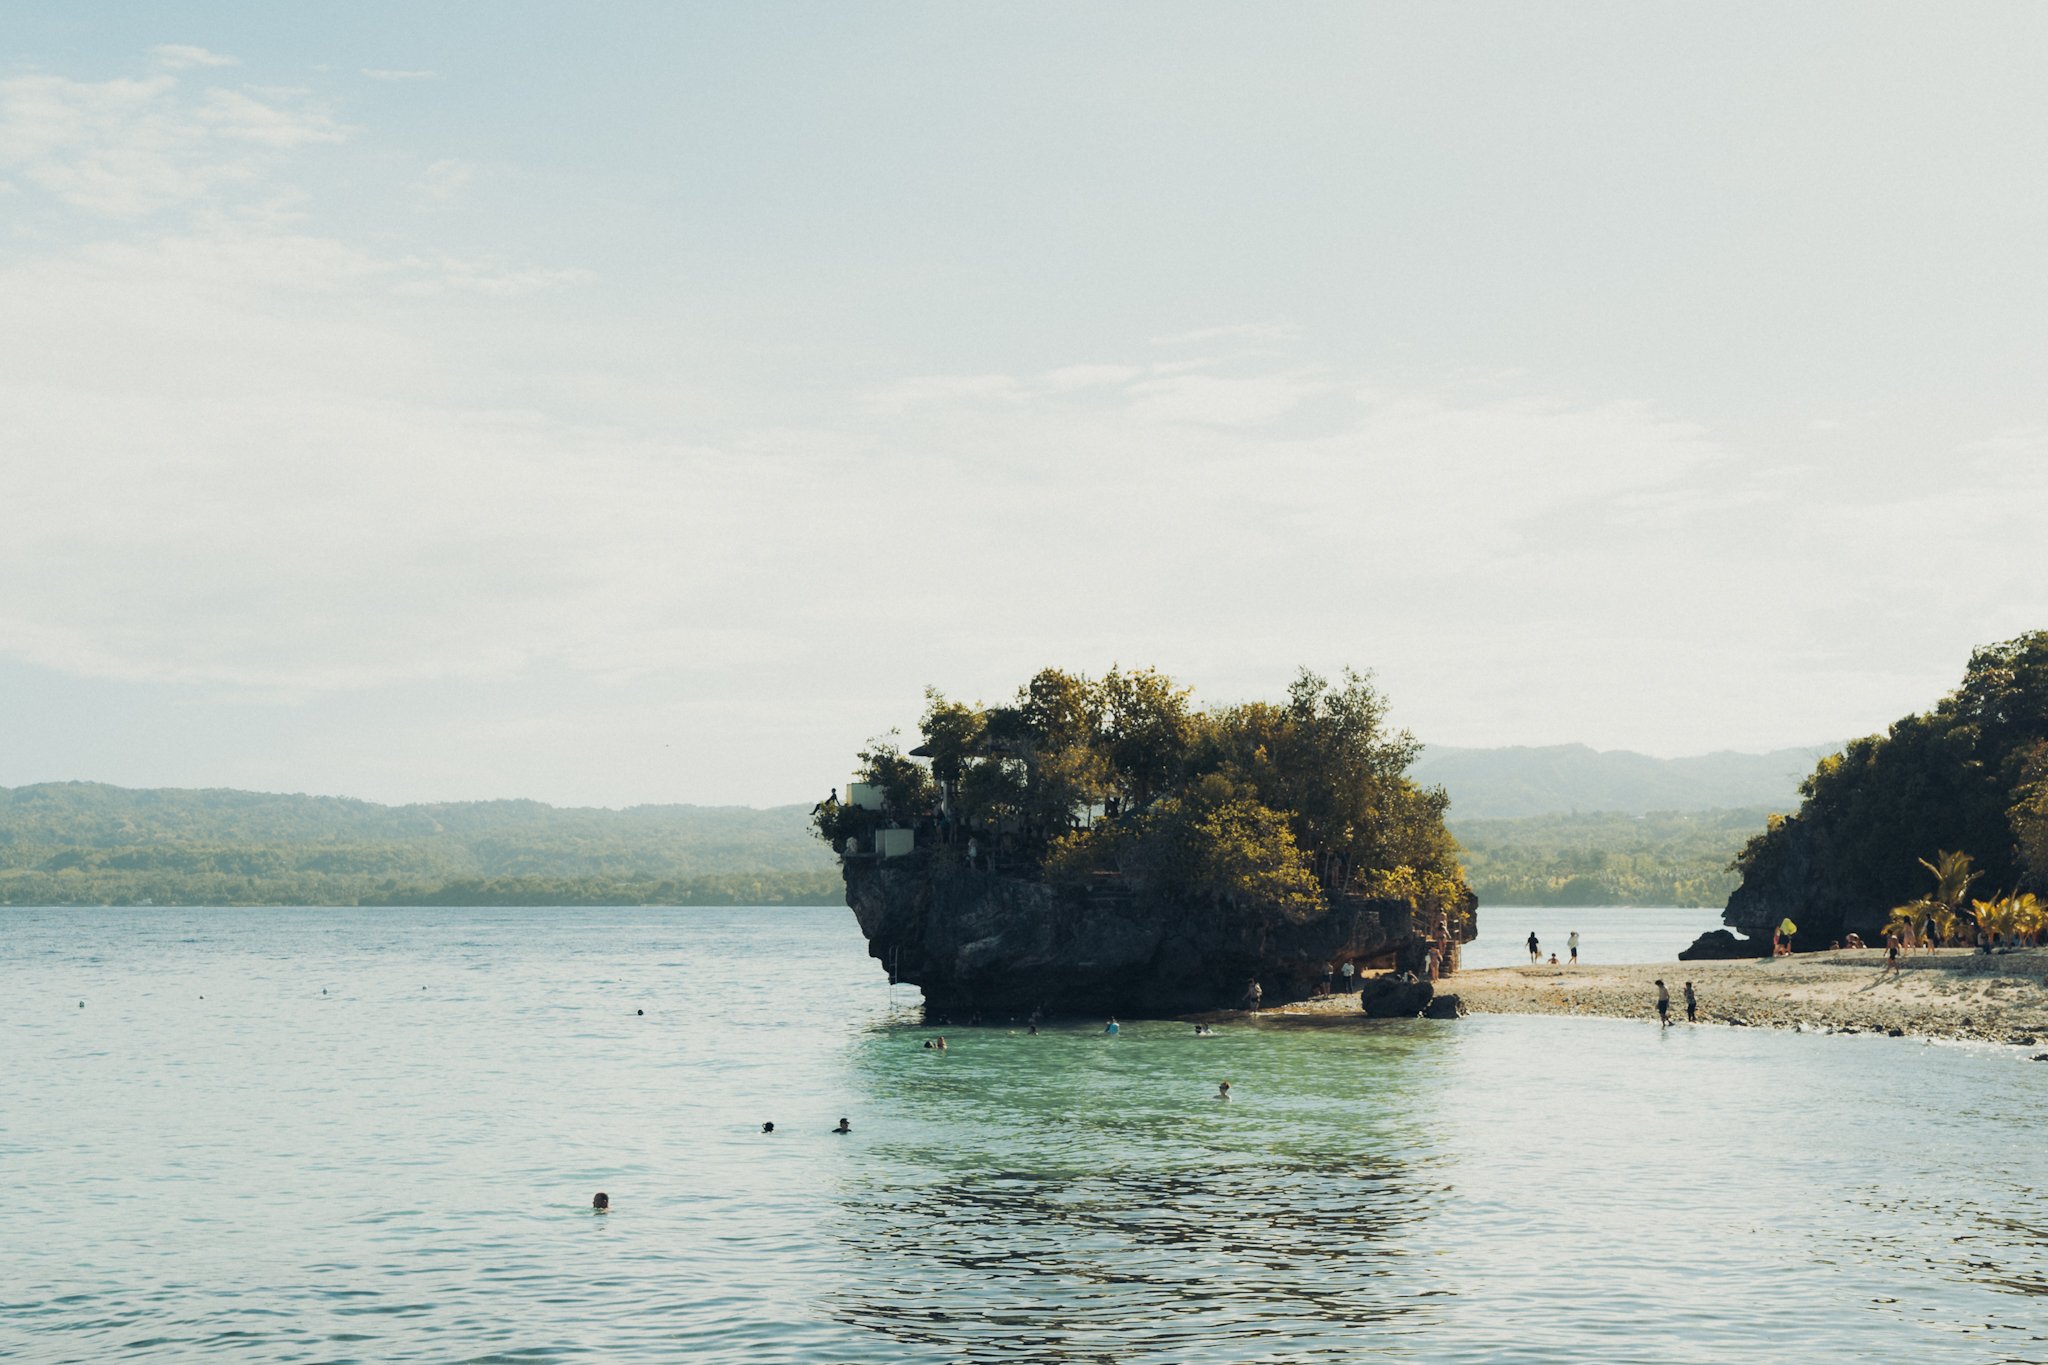
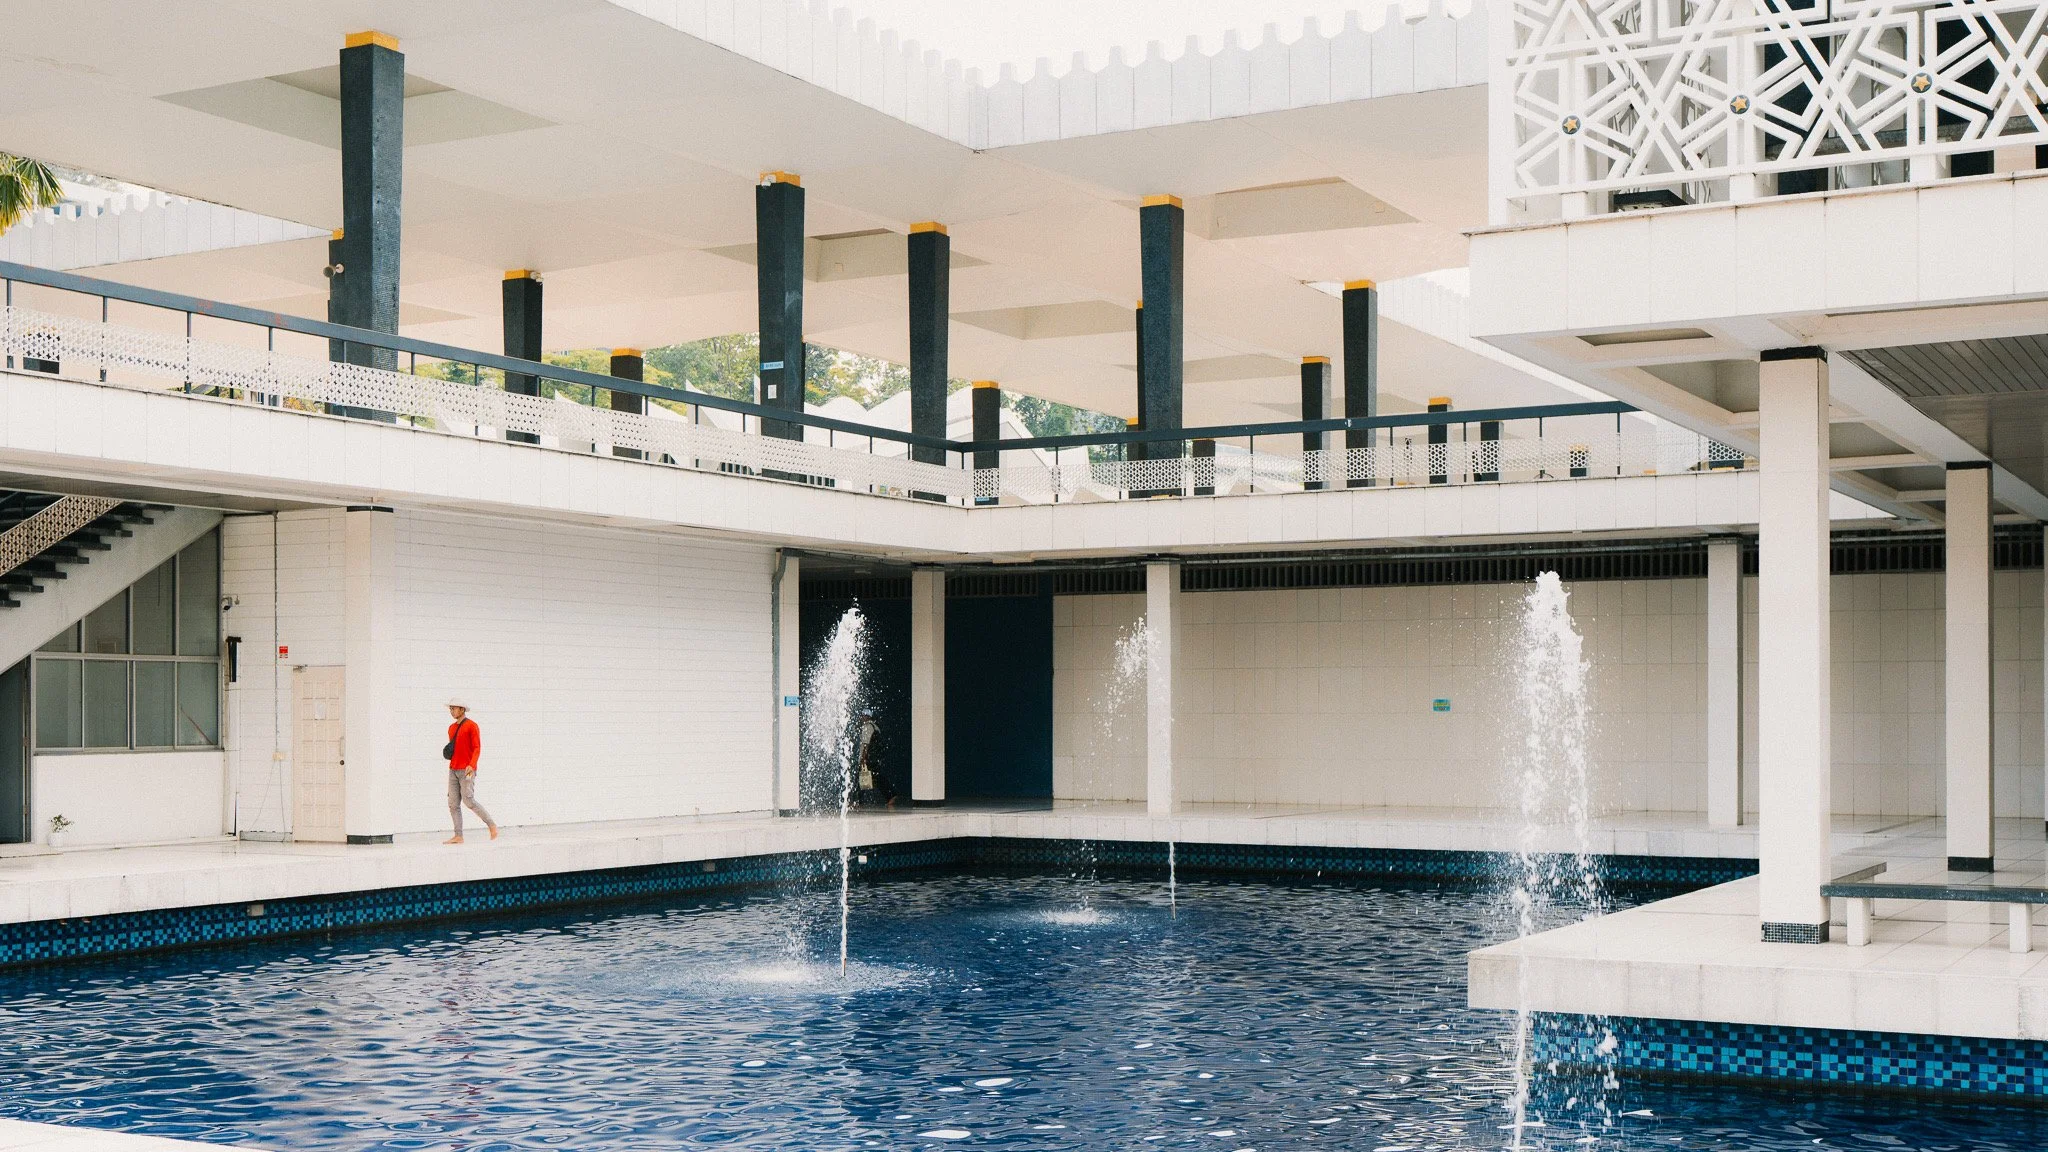
Every place on earth exhibits tonal contrast - if you know what to look for. All of my images below exhibit it in some way. Of course, some do so more than others.
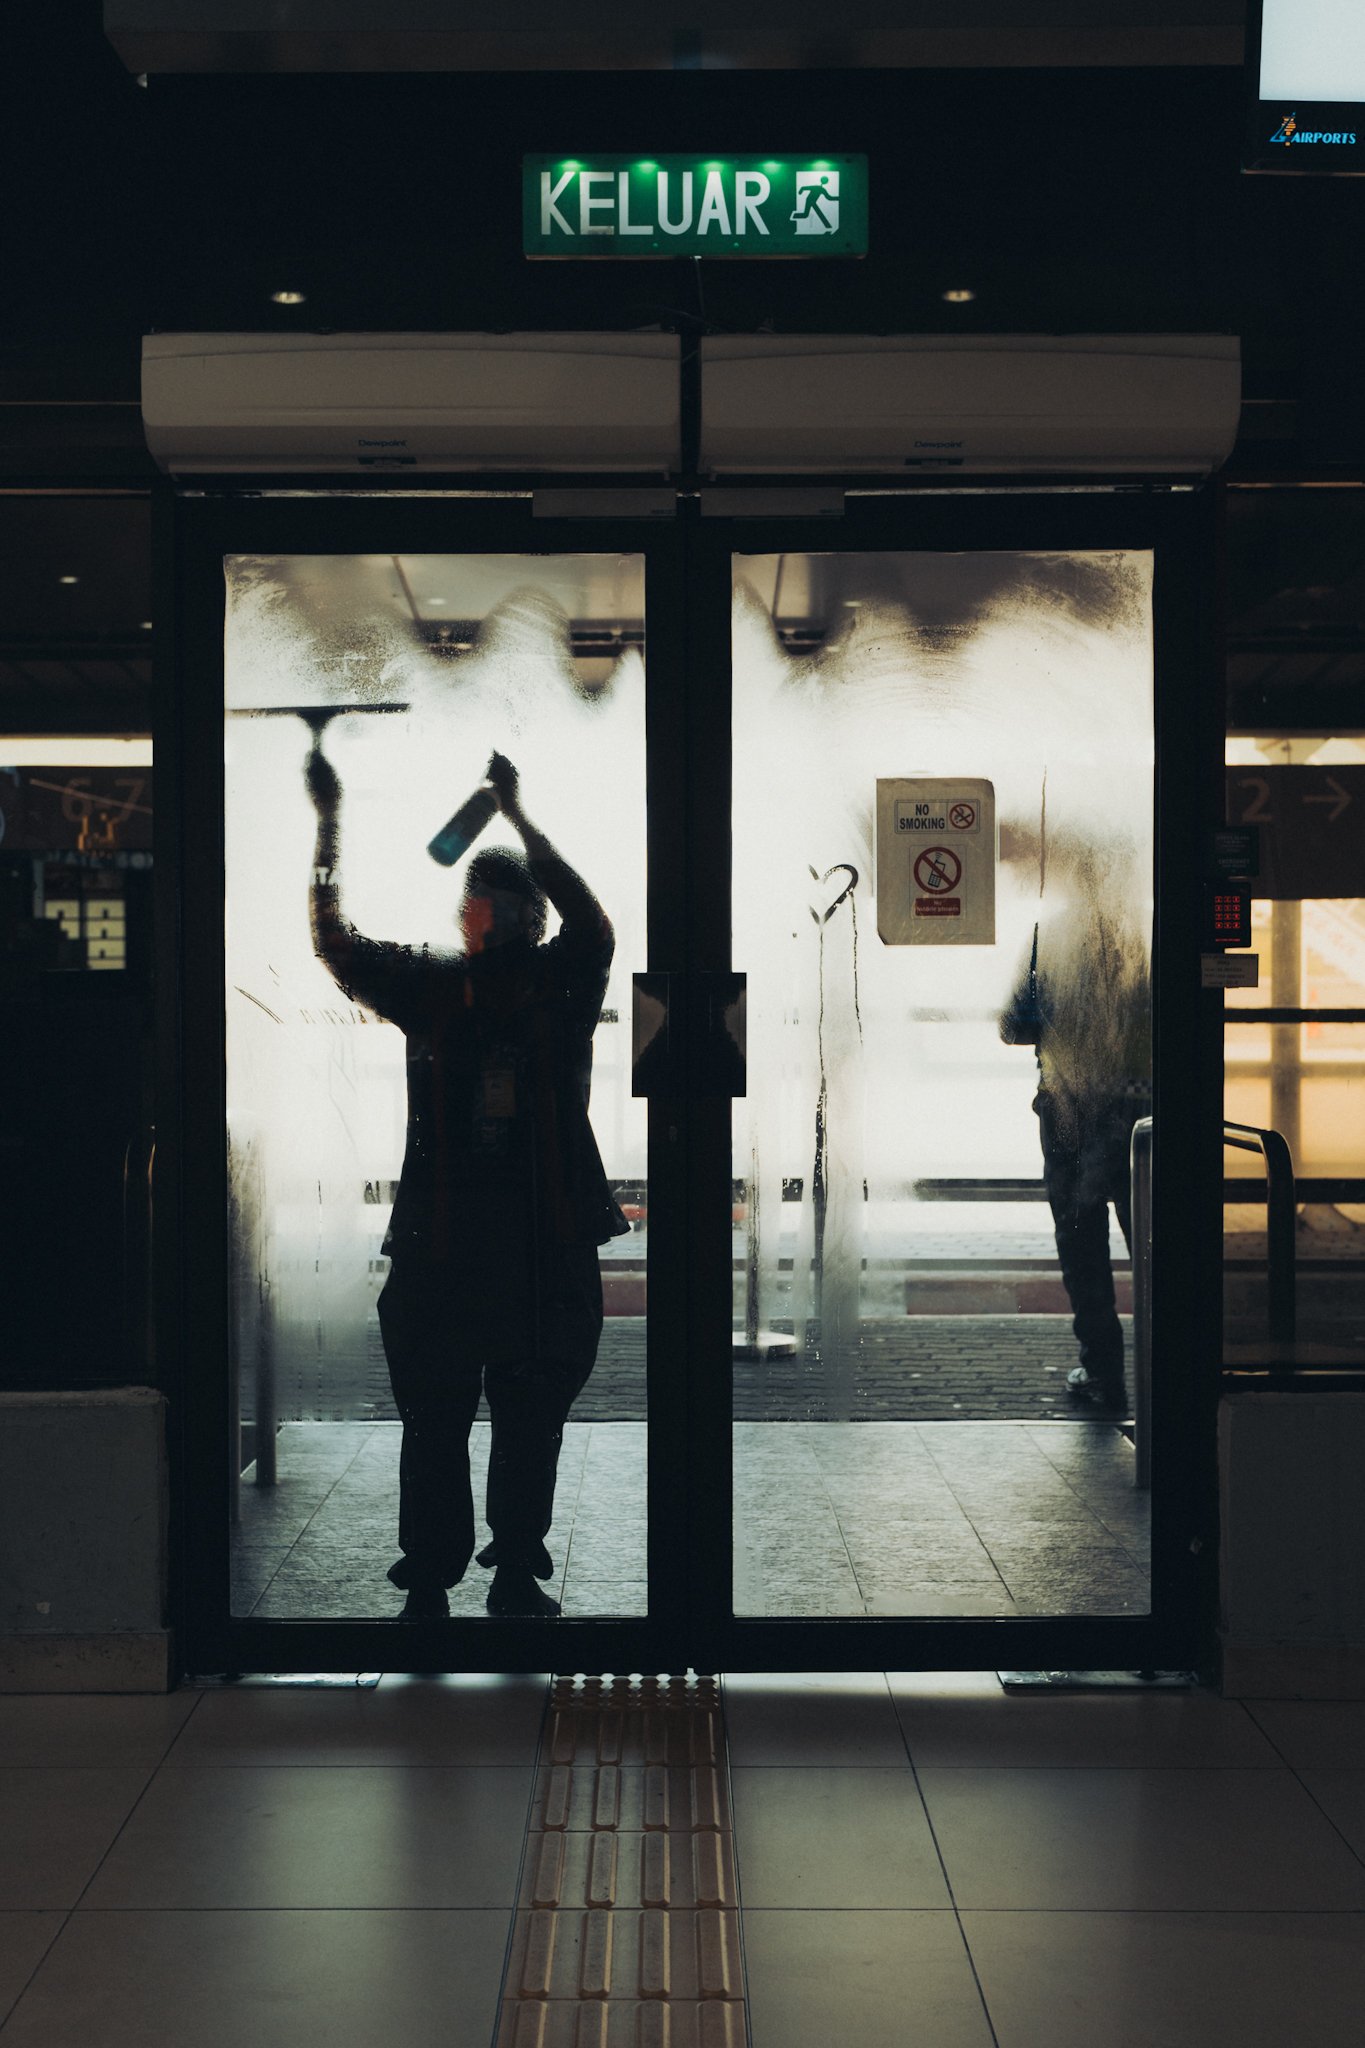
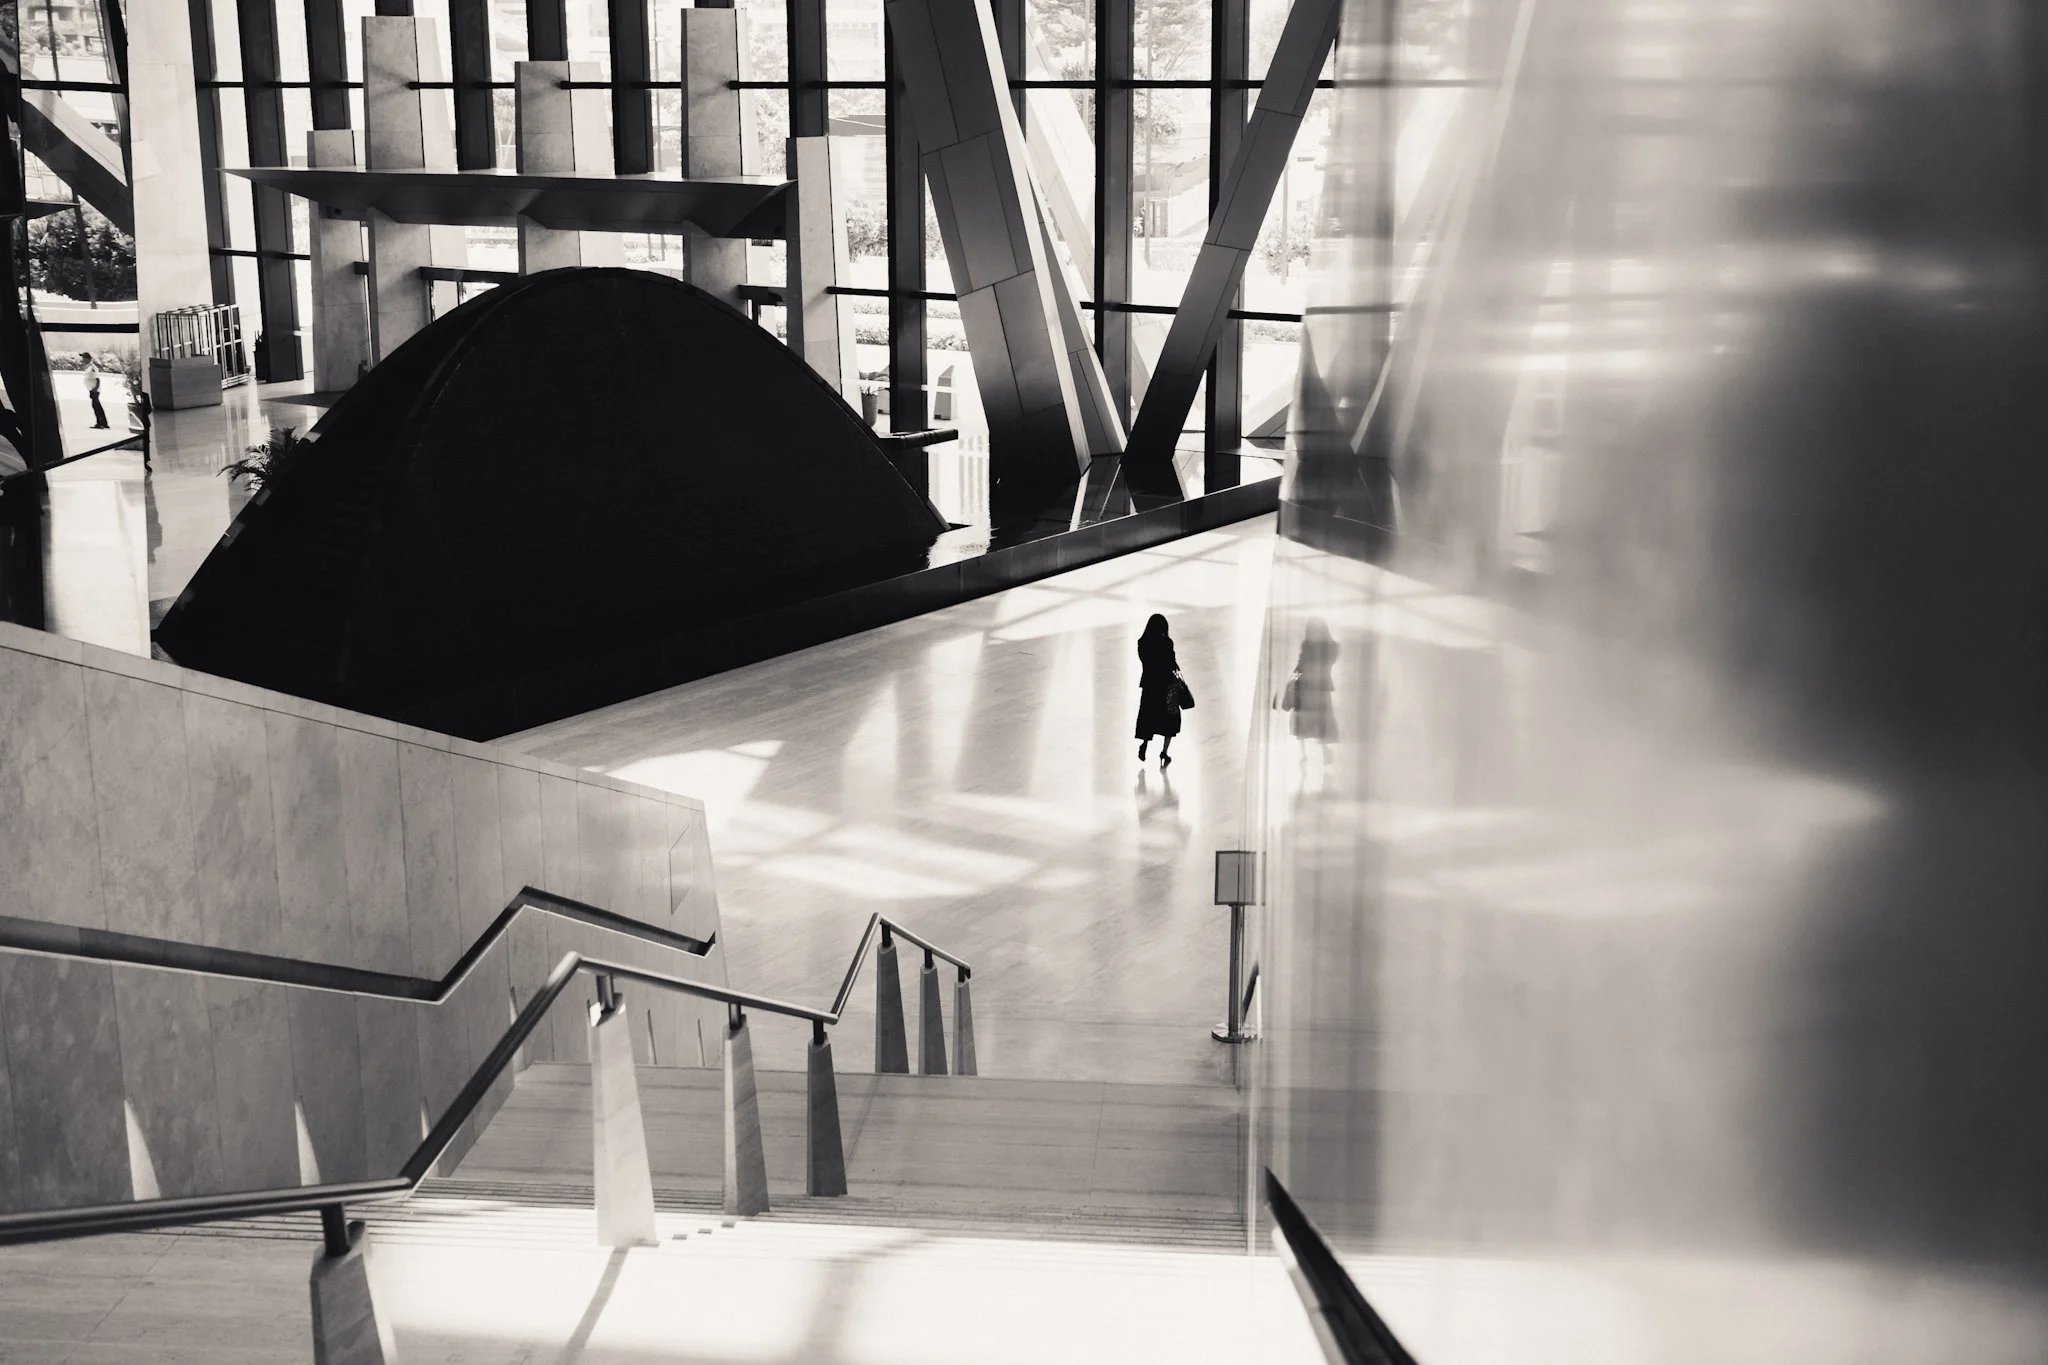
So what is tonal contrast? Tonal contrast is the difference between the light and dark areas in your photo. The bigger the gap between your lightest and darkest areas, the higher the tonal contrast. And while contrast technically covers the whole image, using specific pockets of contrast can transform an otherwise flat image.
Think silhouettes, highlights against a shadowy background, someone wearing dark clothing against a light wall, simple pockets of light.
None of these images were taken in “good” lighting conditions, but all of them have tonal contrast and that provides images that are visually pleasing, but also carry drama, mood, and a reason to linger.
Next time you’re somewhere new and want to capture it well despite the conditions, look out for natural tonal contrast - and please don’t just crank up the contrast slider in post.
Bonus tip: If you are relying on tonal contrast alone to make an imagine interesting, this is where turning an image black and white can have a greater impact.
Try to “Over-Expose”
If you shoot in full manual mode all the time, this tip is not for you. If, like most photographers, you have at least one of the exposure triangle (shutter, aperture or ISO) set to Auto, you might want to know my favourite tip for shooting in bad light.
You’ve arrived at your destination to take some photos. You’ve missed the best of the light because you were in bed or drinking coffee, there’s no dramatic colour, and not much tonal contrast. What do you do?
Don’t put the camera away. The key is exposure compensation.
Have you ever returned from a shoot on a bright and sunny or a flat overcast day of shooting and think that all of your images look way darker than you remember the scene being at the time?
Yep, that’s your camera’s metering system giving you the most scientifically middle grey range of tones possible. While it’s technically correct, that is not how our eyes (and memories) work. Compound this with generic advice to under-expose and bring up the shadows in post, your photos can start to look very underwhelming.
When you encounter days like this, shifting your exposure compensation to +2/3 or +1 can massively improve the overall look of your images. “What about protecting the highlights?” I hear you scream.
Two things. Firstly, modern camera sensors are so good now that there will still be details in seemingly blown out highlights that can be recovered (if you’d like them). Secondly, I’d encourage you to ask the question about what is actually interesting about a blue sky or flat overcast clouds? If it forms a crucial part of your story, then fine, but if not, the extra detail is a distraction from what you are actually wanting to show in your image.
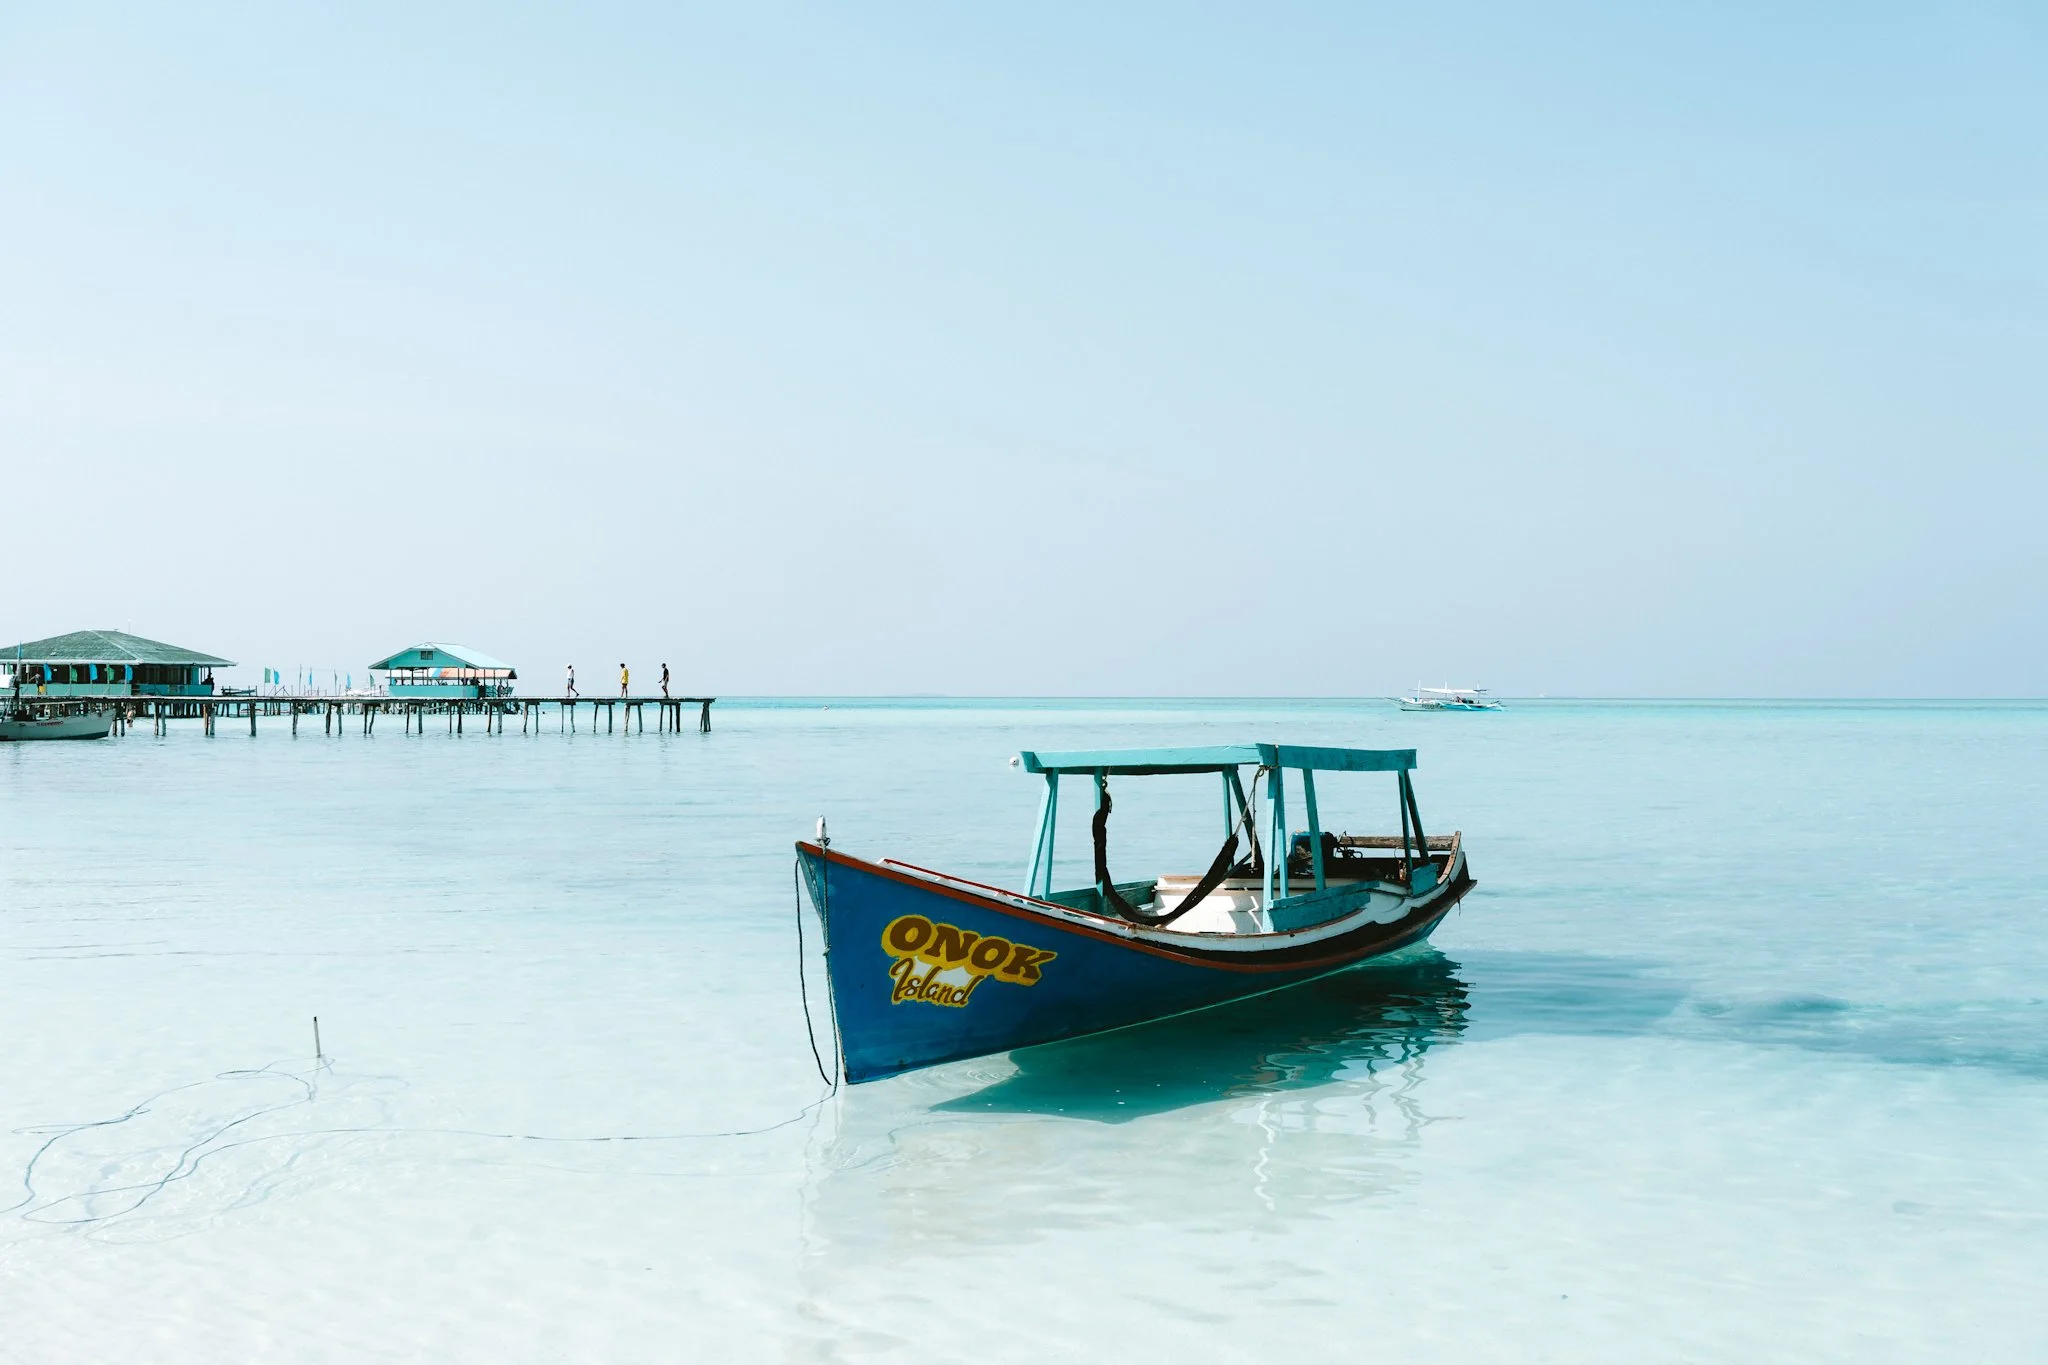
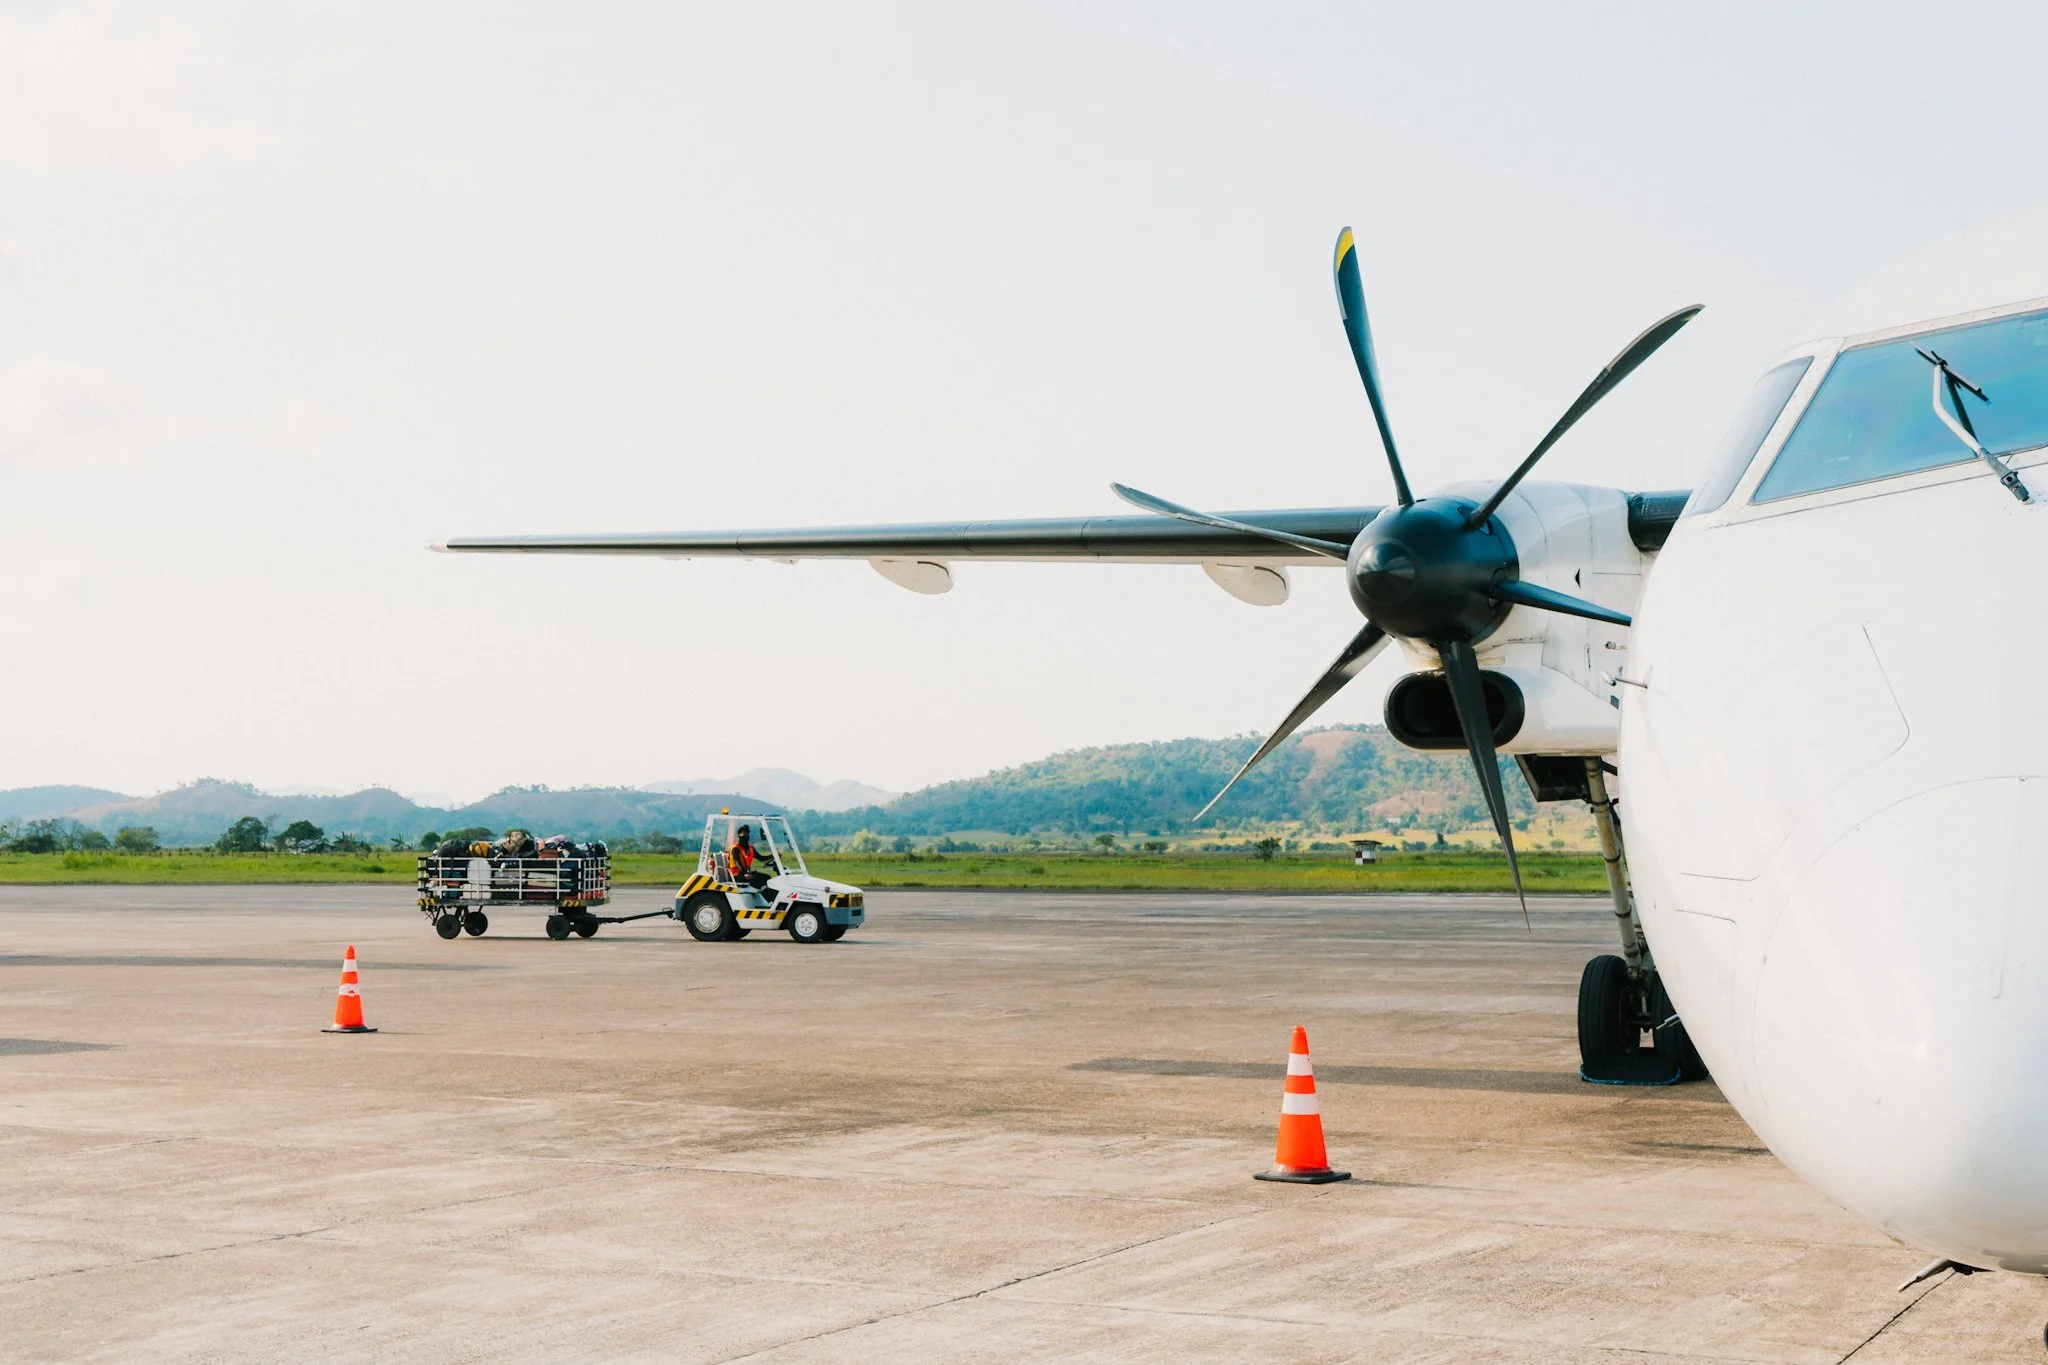
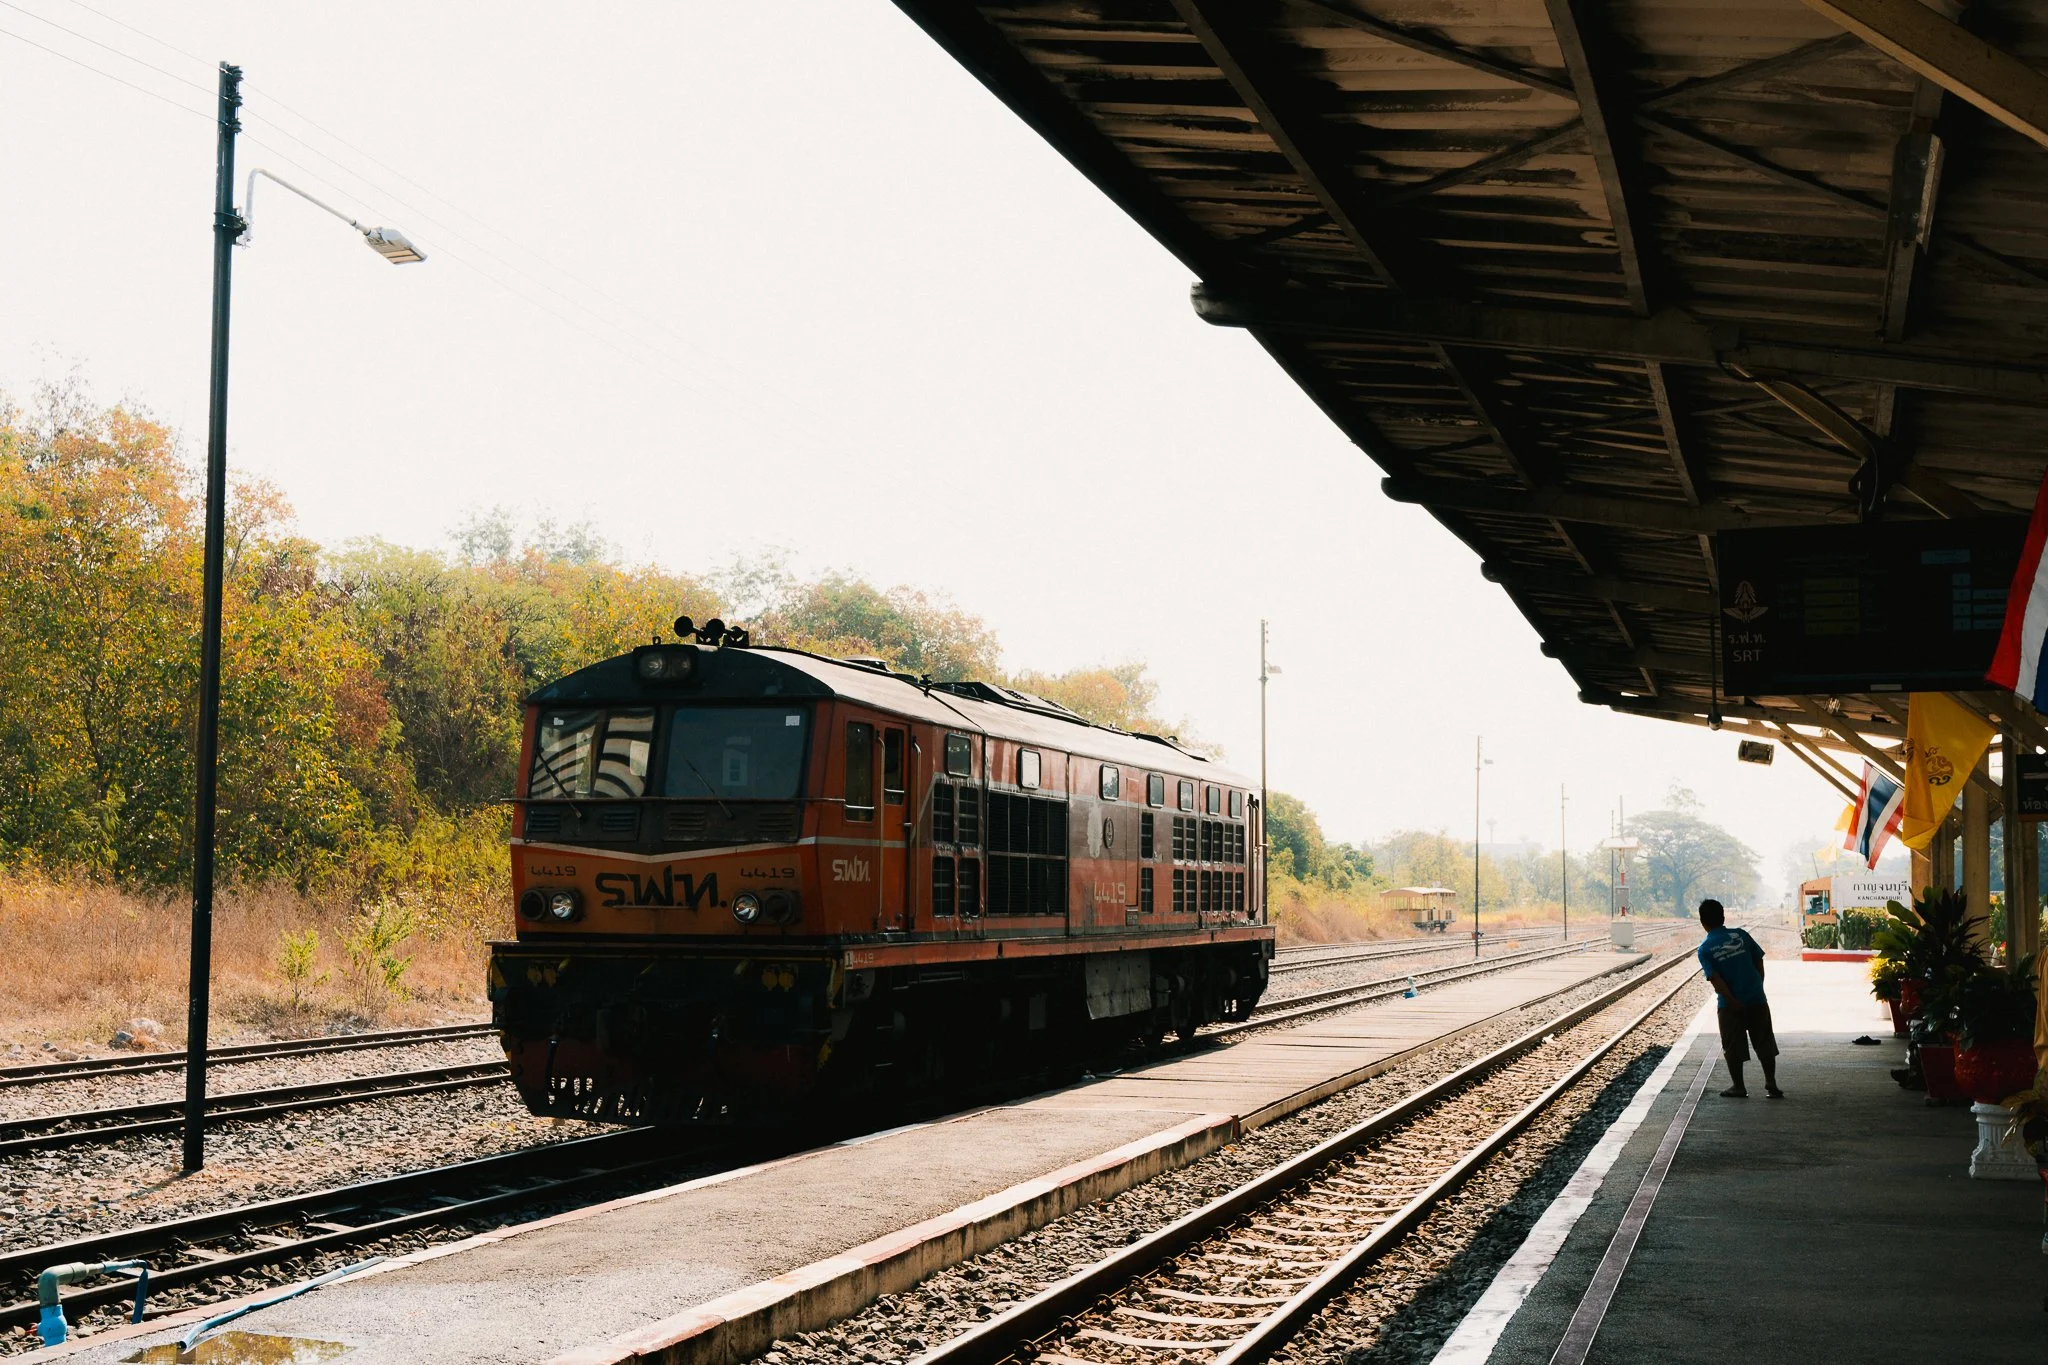
The three images below are all shot with positive exposure compensation in camera. The light wasn’t great in any of them, but I’ve still walked away with images that I am happy with. They’re more dynamic, the colours come out more, they feel how I remember them.
Next time you’re out with your camera and the conditions feel against you, try nudging your exposure compensation to +1 before you even start shooting. Review your first few frames and adjust from there. It takes seconds and might be the single quickest way to improve how your travel photos look.
Don’t forget to sign up for email updates using the form below - it’s the easiest way to keep up to date with new blog posts, gear changes, travel updates and new products.